Headless CMS > Notes App Tutorial
Webiny Infrastructure Setup
Learn how to set up a new User Pool in Webiny, enable authentication for it, and restrict users’ access to only their own content.
This feature has been available since Webiny v5.40.0 and is available in Business & Enterprise tier.
- how to set up a new User Pool in Webiny and enable authentication for it
- how to limit users’ access to only the content they’ve created
Webiny Infrastructure Setup
Notes App User Pool and User Pool Client
The extensions/notesApp code covered in this section can be found in our GitHub examples repository
The first step is to set up an AWS Cognito User Pool and User Pool Client specifically for Notes App users. All users who sign up through our Notes App (React App) will be created in this User Pool.
- To get started, we first scaffold a new workspace extension in the
/extensions/notesAppfolder, via the following command:
This command will create notesApp extensions in <webiny-project-home>/extensions/ location.
- In the
extensions/notesApp/srcdirectory, create theconfigureNotesAppCognitoUserPool.tsandapplyNotesAppEnvVariables.tsfiles.
- Now export the
configureNotesAppCognitoUserPoolandapplyNotesAppEnvVariablesmodules. Add the following content in theextensions/notesApp/src/index.tsfile.
- In the core app configuration, add the Cognito User Pool for Notes App users by updating the
apps/core/webiny.application.tsfile with the following changes.
- Add environment variables related to the Notes App’s Cognito User Pool to the Webiny API application by updating the
apps/api/webiny.application.tsfile with the following changes.
Add Cognito Authenticator for Notes App Users
Add the Cognito Authenticator for Notes App users. This authenticator will be responsible for authenticating and authorizing the Notes App users. Add the following Cognito Authenticator to the apps/api/graphql/src/security.ts file.
Add Types for Environment Variables
Since we have used process.env.NOTES_APP_COGNITO_REGION and process.env.NOTES_APP_COGNITO_USER_POOL_ID in
the security.ts file above, let’s add these types to the types/env/index.d.ts file.
This file is located at <project-root>/types/env/index.d.ts.
Deploy the Core and API Applications
The next step is to deploy the Core and API applications. This will create the necessary infrastructure and enable the Cognito authenticator for Notes App users that we created earlier.
Please run the following commands to deploy the Core and API applications in the development environment. If you are deploying to another environment, replace “dev” with the appropriate environment in the command.
After deployment, you will receive the following values as output:
notesAppUserPoolIdnotesAppUserPoolRegionnotesAppUserPoolArnnotesAppUserPoolClient
Please save these values, as they will be needed when creating the React App.
If you lost these values, don’t worry. You can also retrieve them from the your-webiny-project-root/.pulumi/apps/core/.pulumi/stacks/core/dev.json file within your Webiny project.
Since we’ve deployed the dev environment for the demo, we’re seeing the dev.json file. If you’ve deployed your project in a different environment, you’ll find a file named after your environment, such as your-env-name.json stack file .
With the webiny watch command running, any changes to the application code will be automatically rebuilt and redeployed to the cloud.
Create Role for Notes App Users
Now, we will create a role for Notes App users and define the permissions for this role. In our scenario, users can read, write, and delete only the content entries they have created.
Navigate to the Roles section under Access Management.
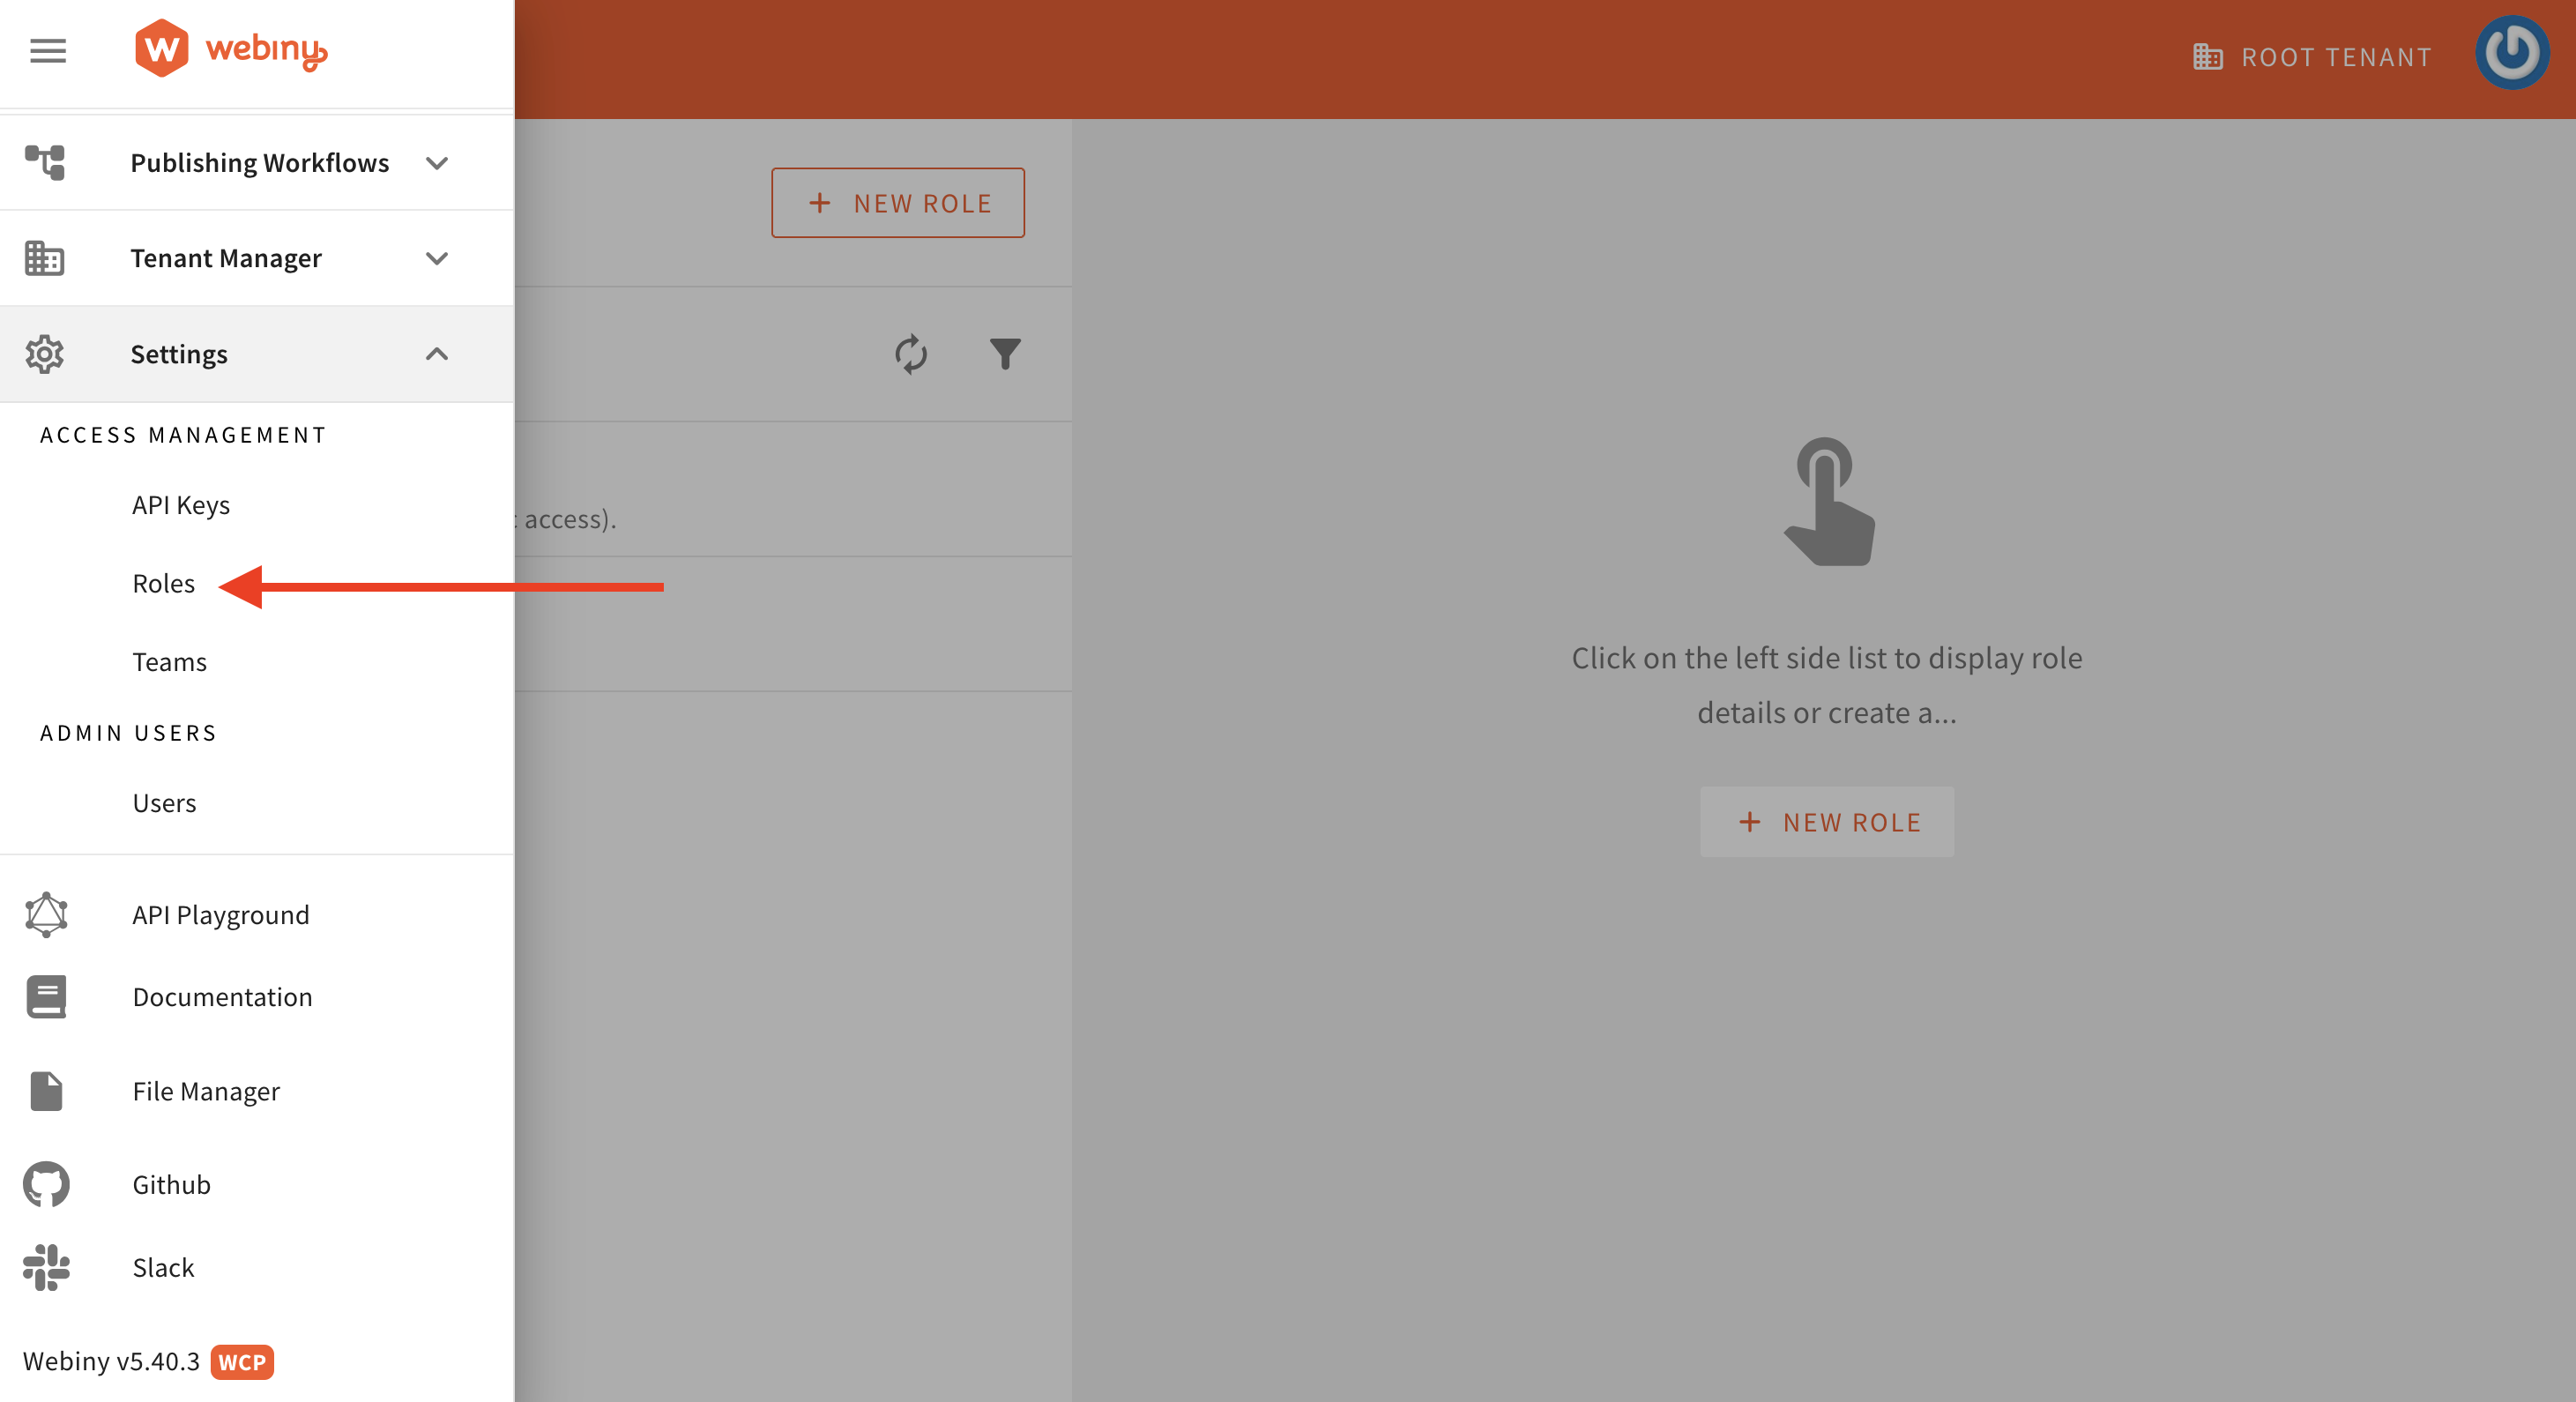 Access Management / Roles
Step 1: Enter the Role Name, Slug, and Description. Set the permissions for either All locales or Specific locales based on your use case.
Please note that the slug is important and should match the one we defined in the Cognito Authenticator for Notes App Users. For our use case, the slug should be notes-app-users.
Additionally, under the Permissions/Content section, select ”All locales” (as shown in the image below). For this demo, we’ve chosen “All locales.” However, for your app, you can opt to select specific locales if needed.
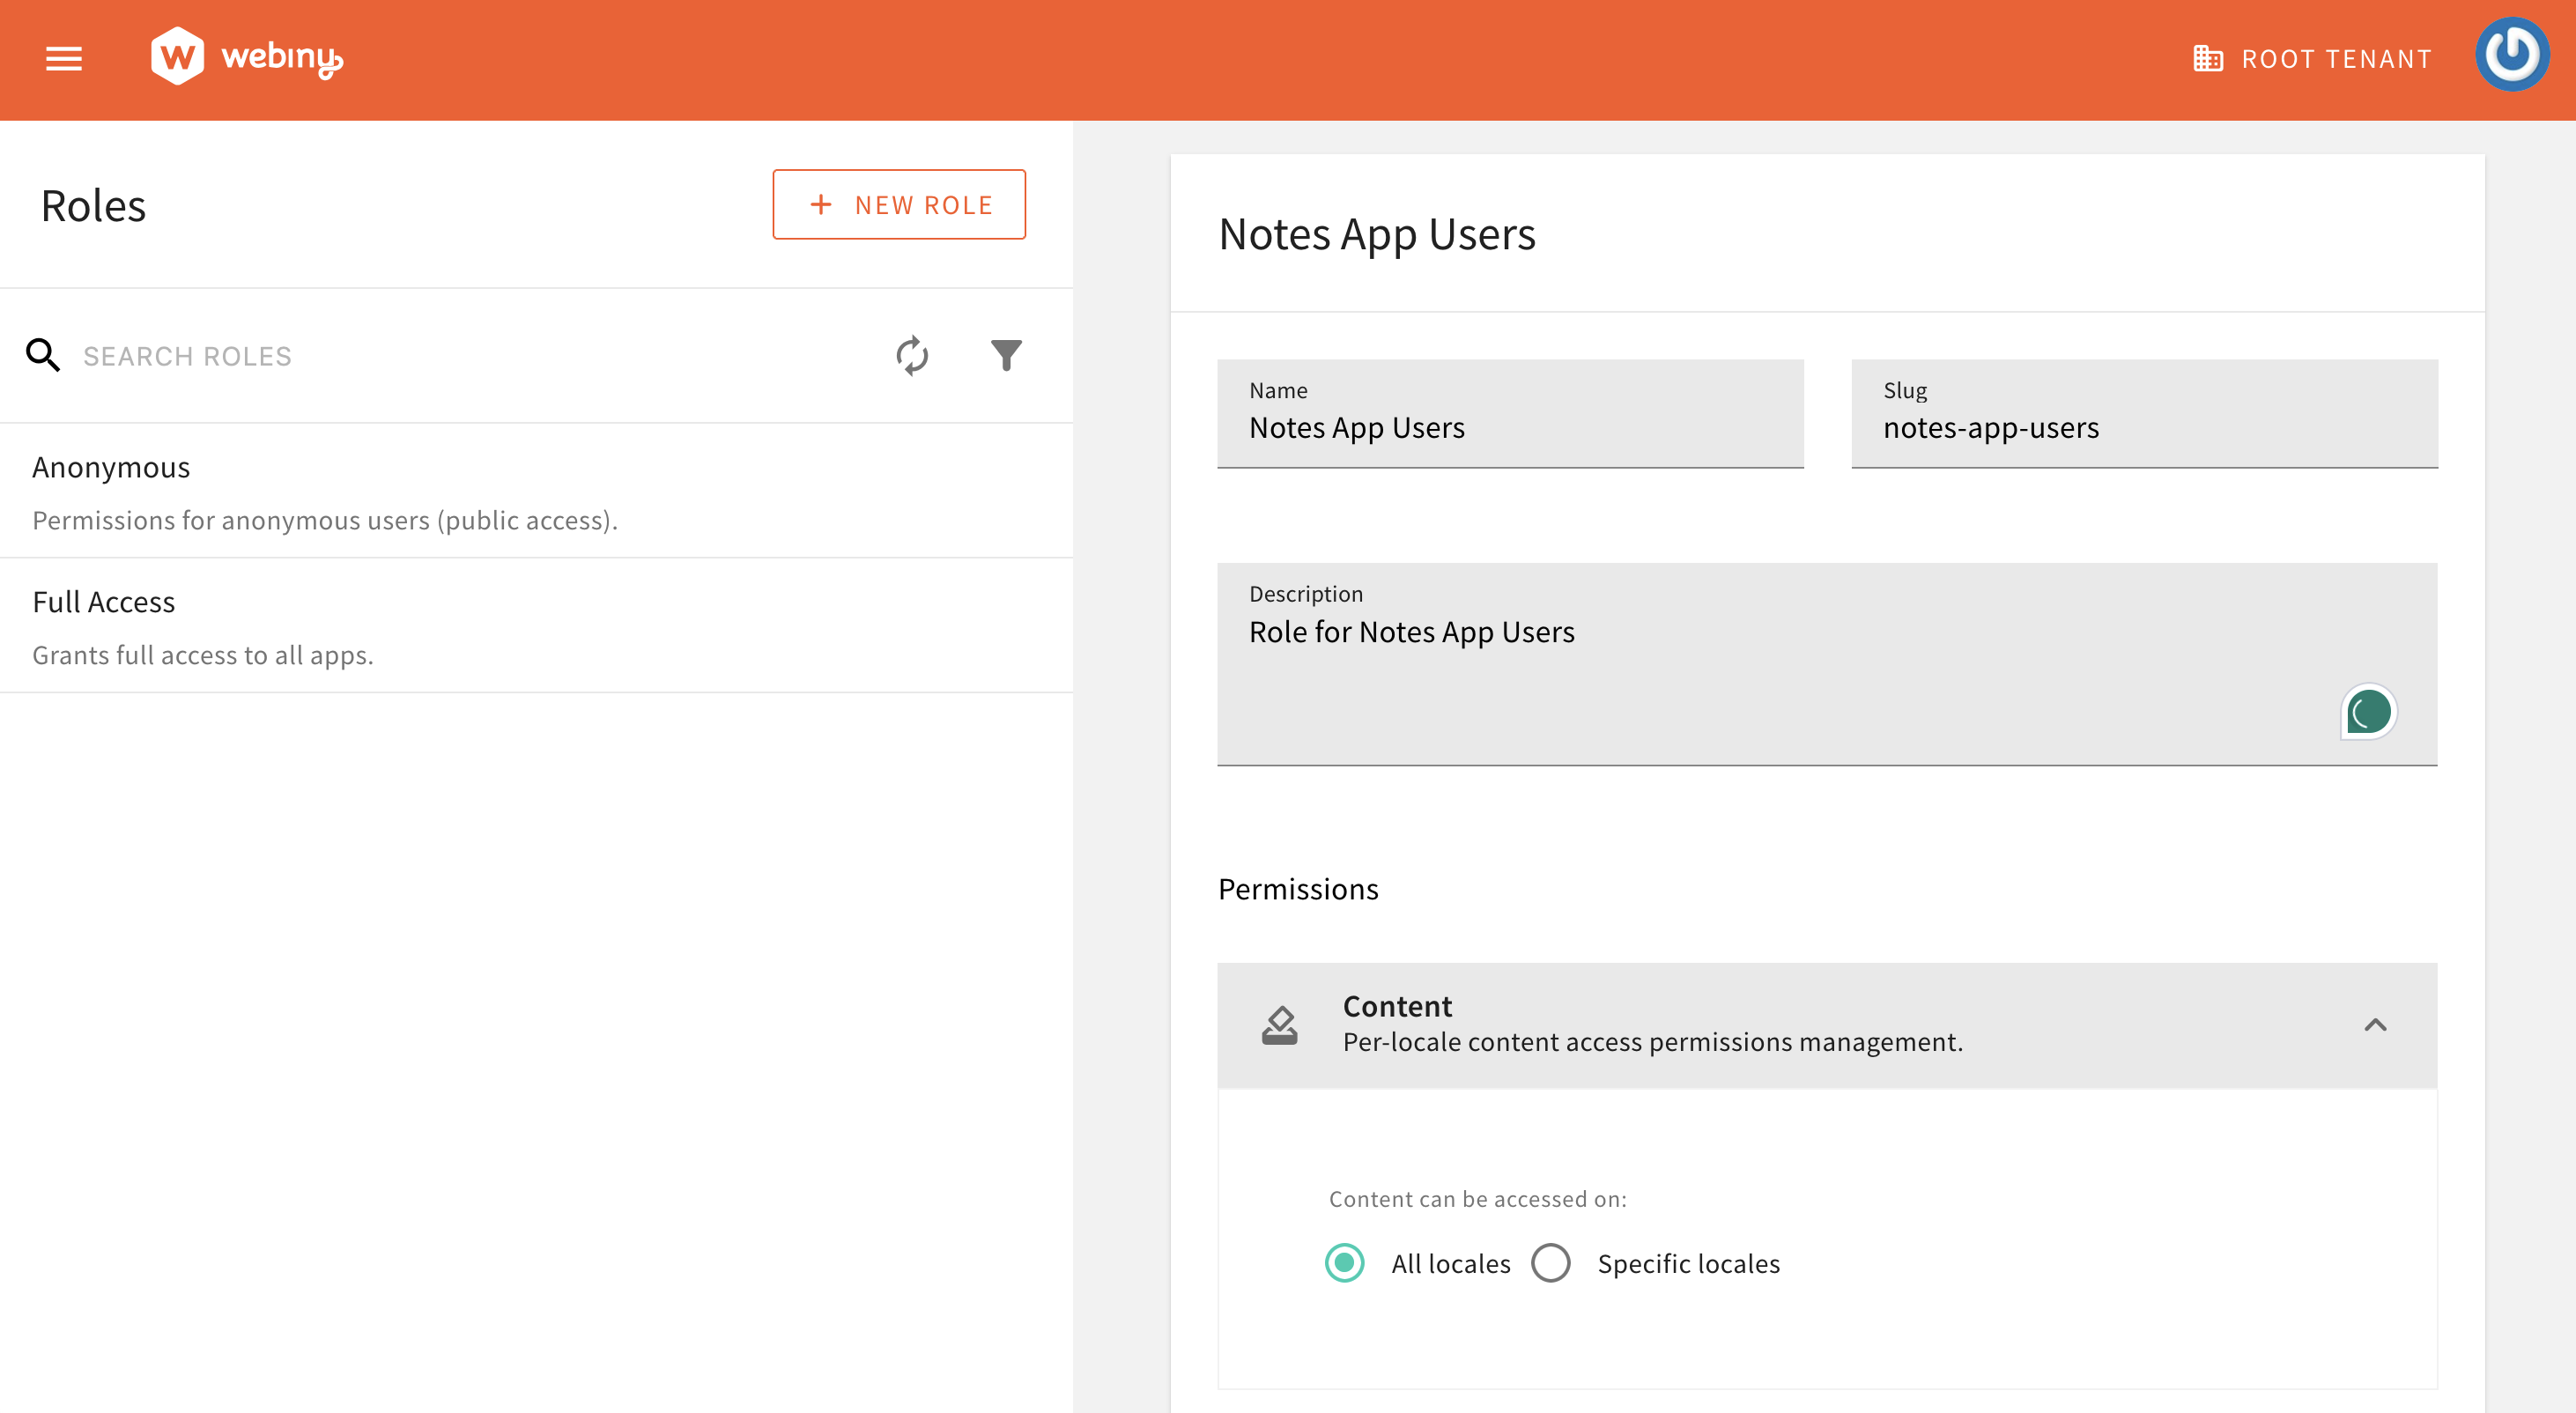 Role Details
Step 3: Set the custom access level for the Headless CMS. Grant Read access to the content model group and content model. For Content Entries, set the scope to Only entries created by the user. Refer to the screenshot below for details.
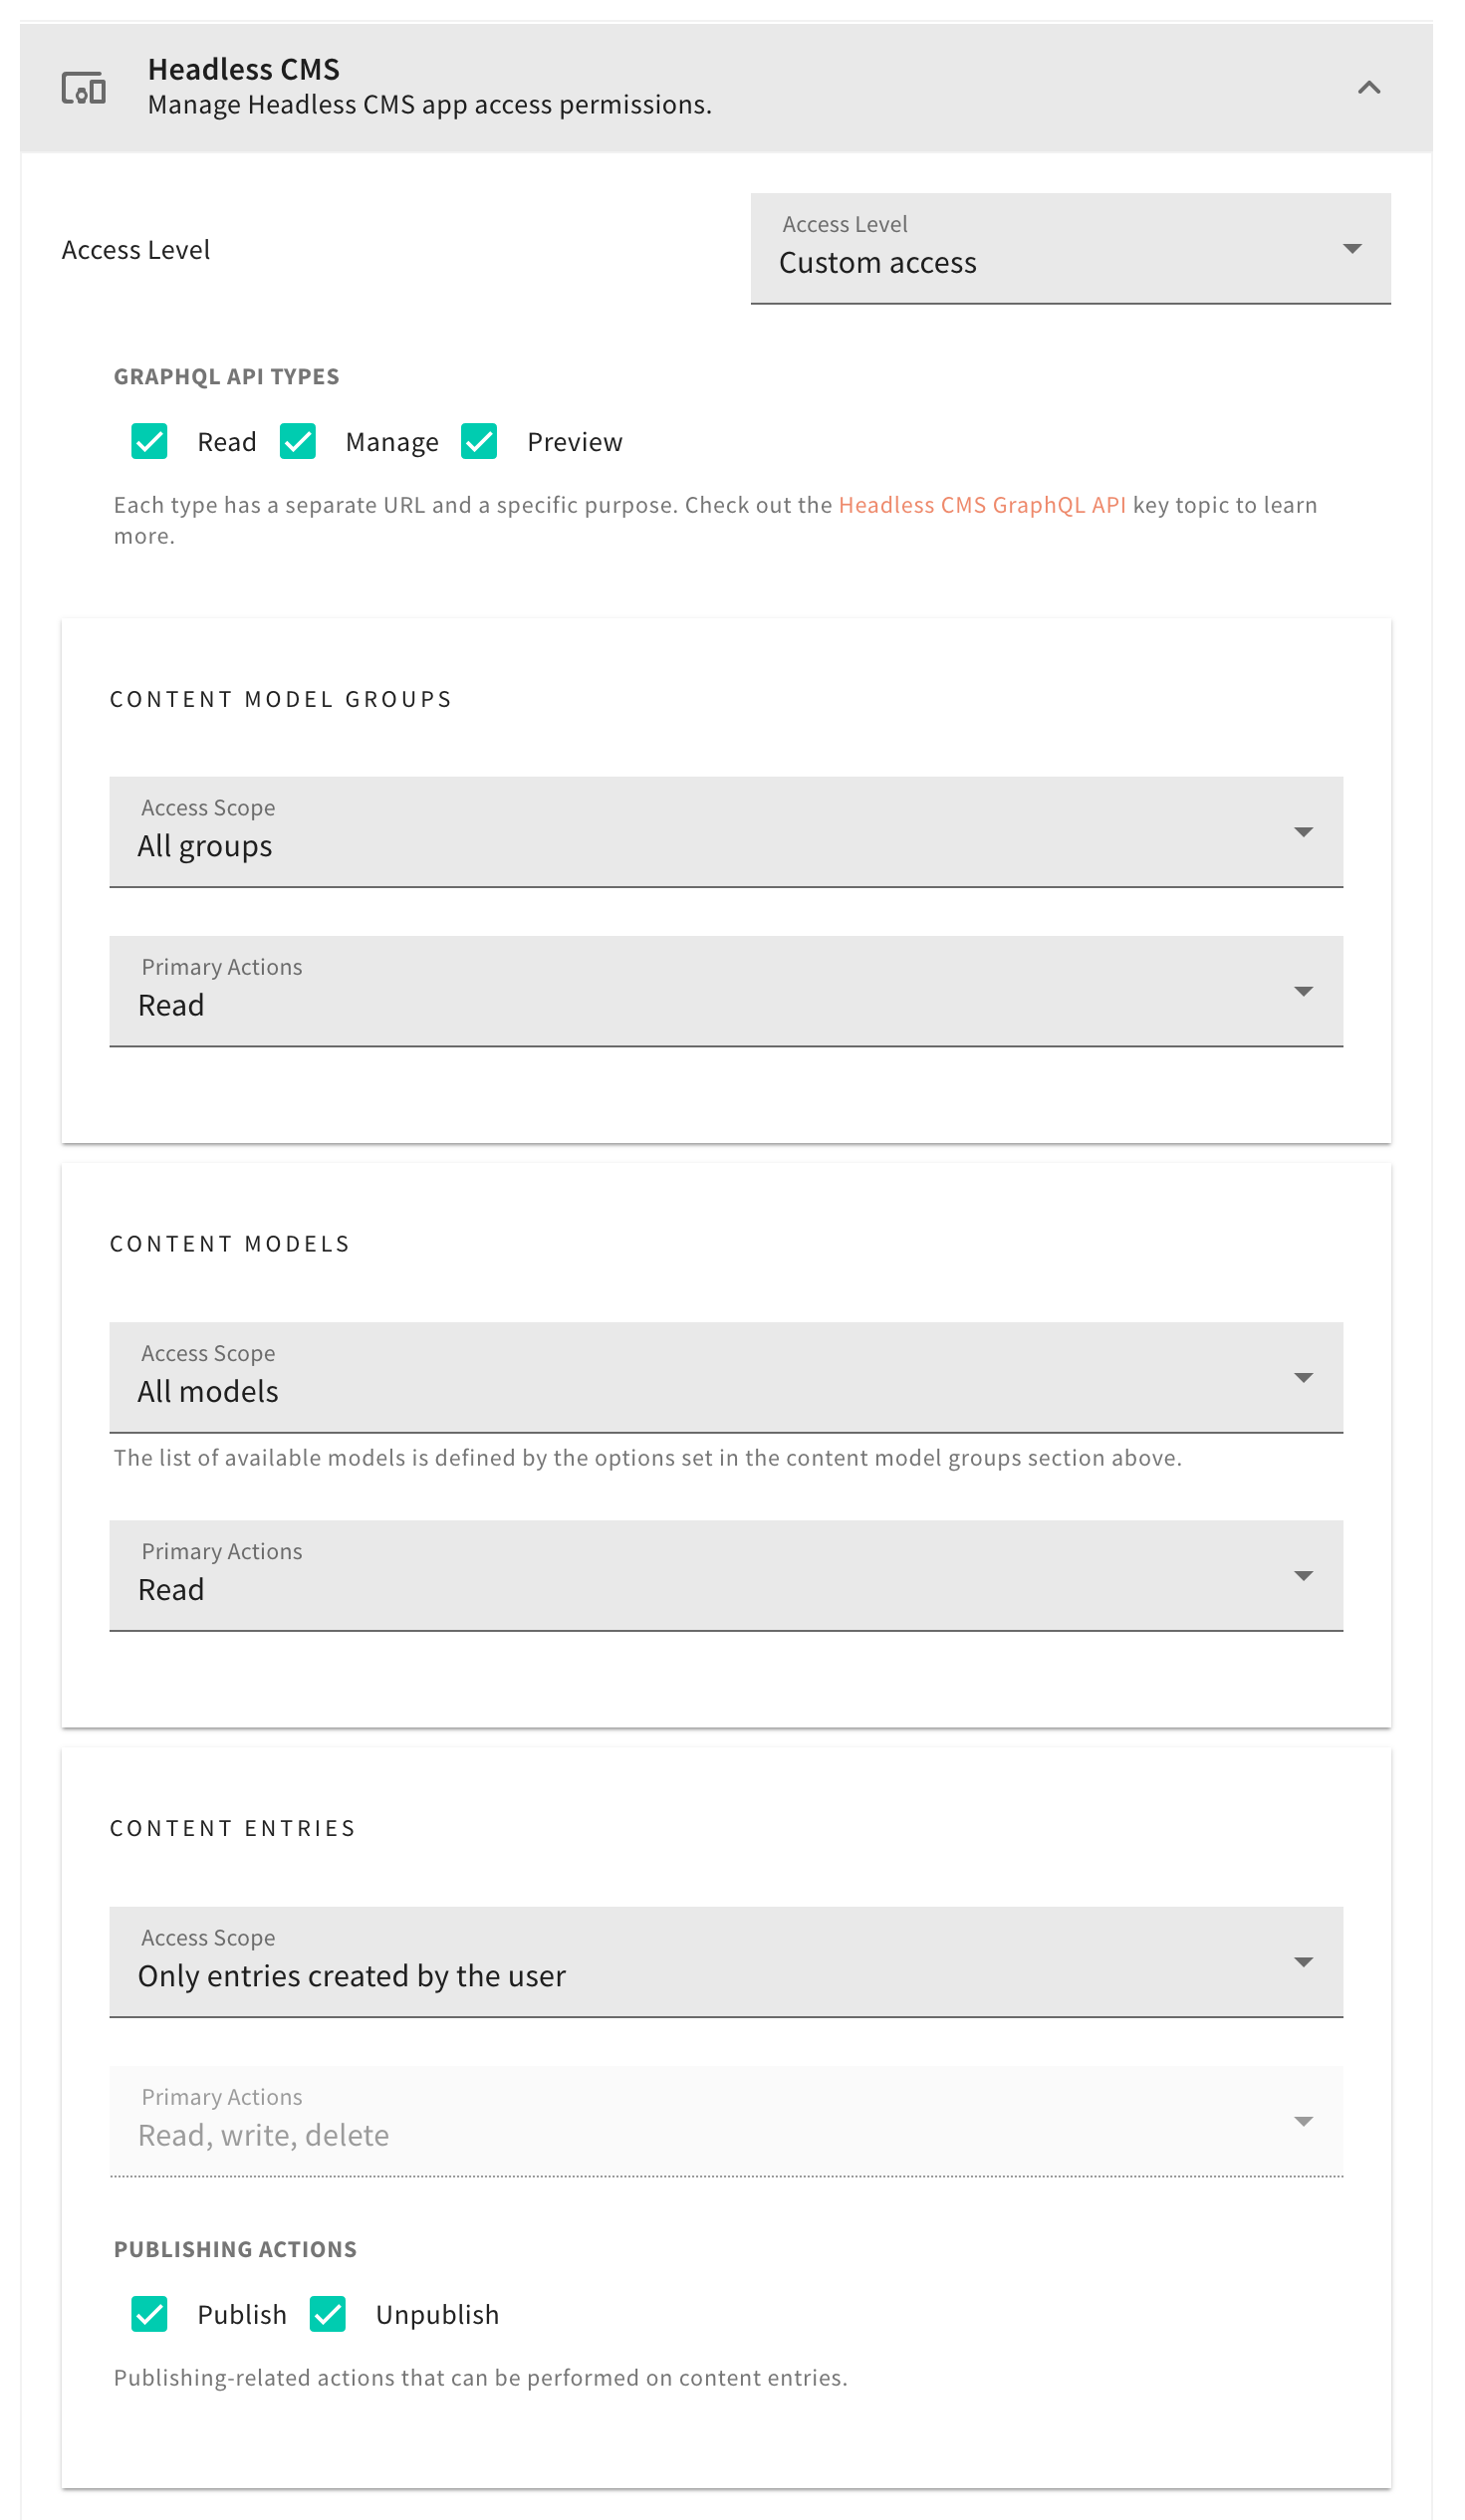 Headless CMS permissions
Create Note Model to Store User Notes
As the final step on the Webiny side, we’ll create a Note Model to store user notes. If you’re new to creating models in Webiny, refer to the Create Content Model user guide.
We’ll set up a Note content model with the following fields:
| Field | Field Type |
|---|---|
| Title | Text |
| Description | Long text |
Step 1: Create the Note Model.
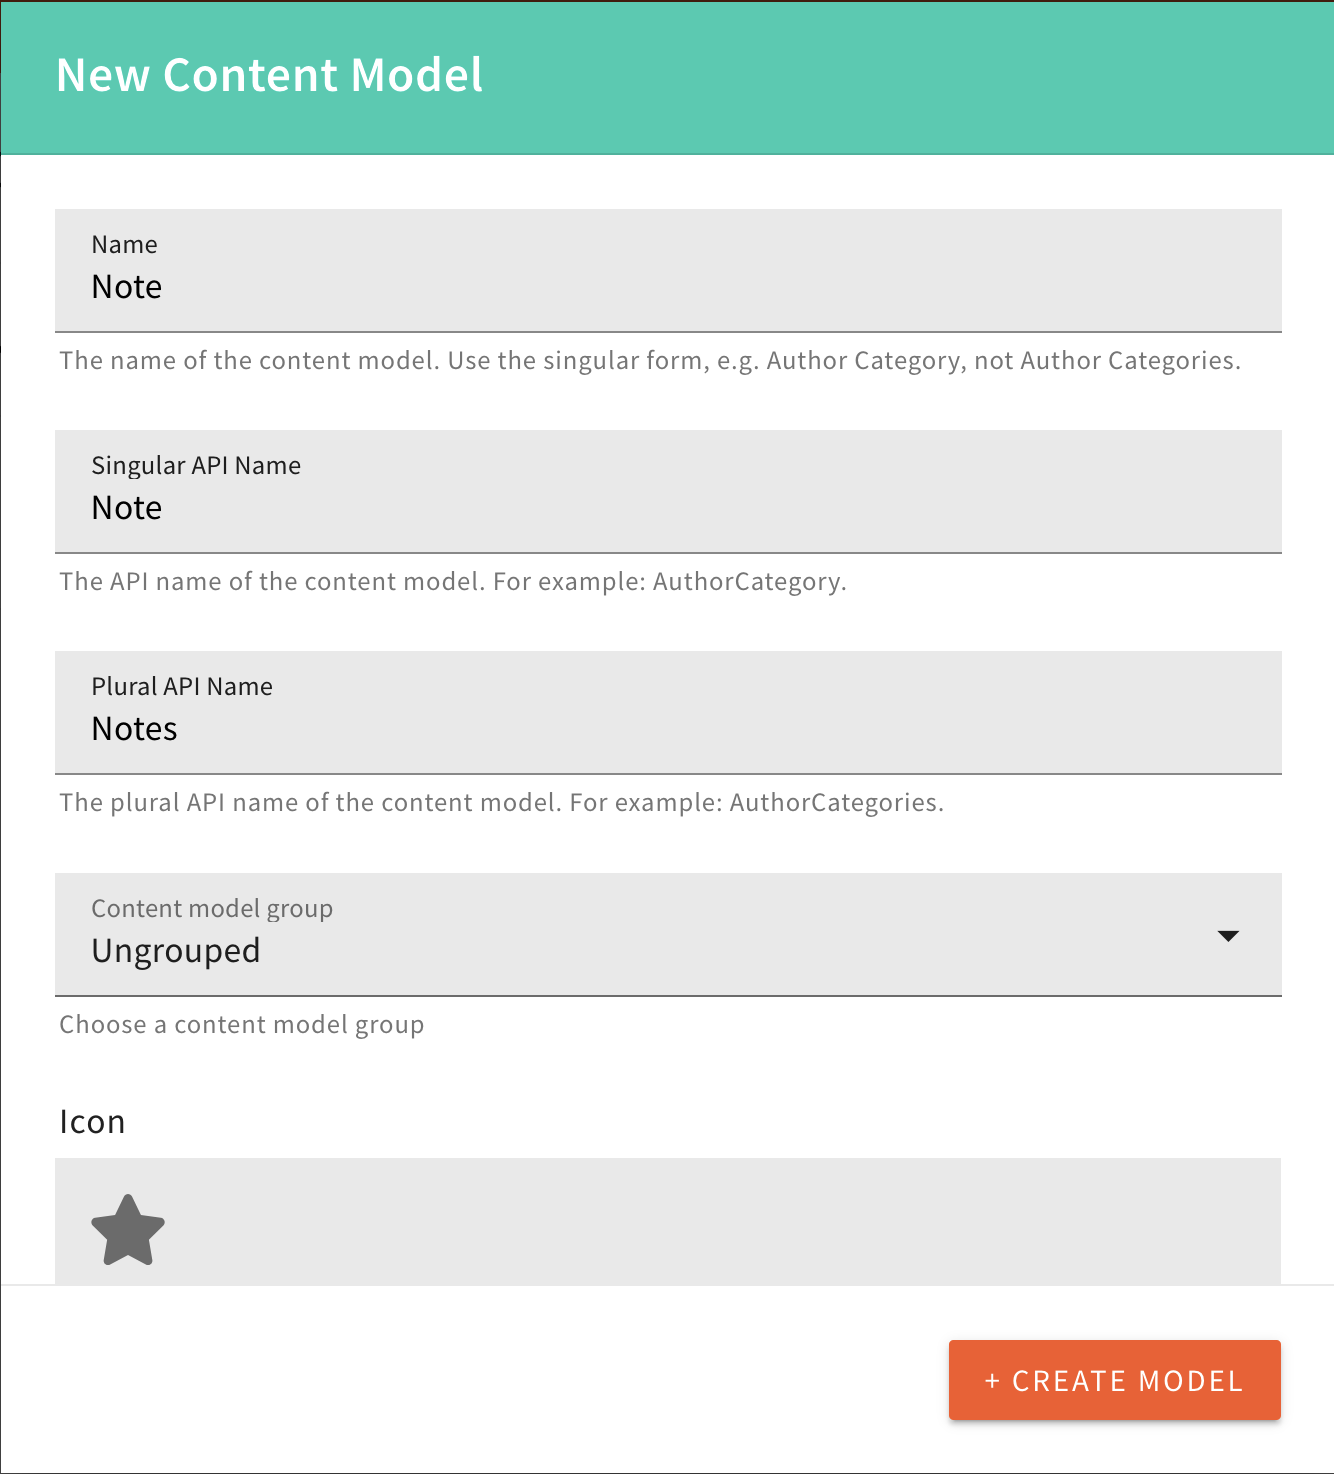 Create Note Model
Step 2: Add Title and Description Fields to the Note Model.
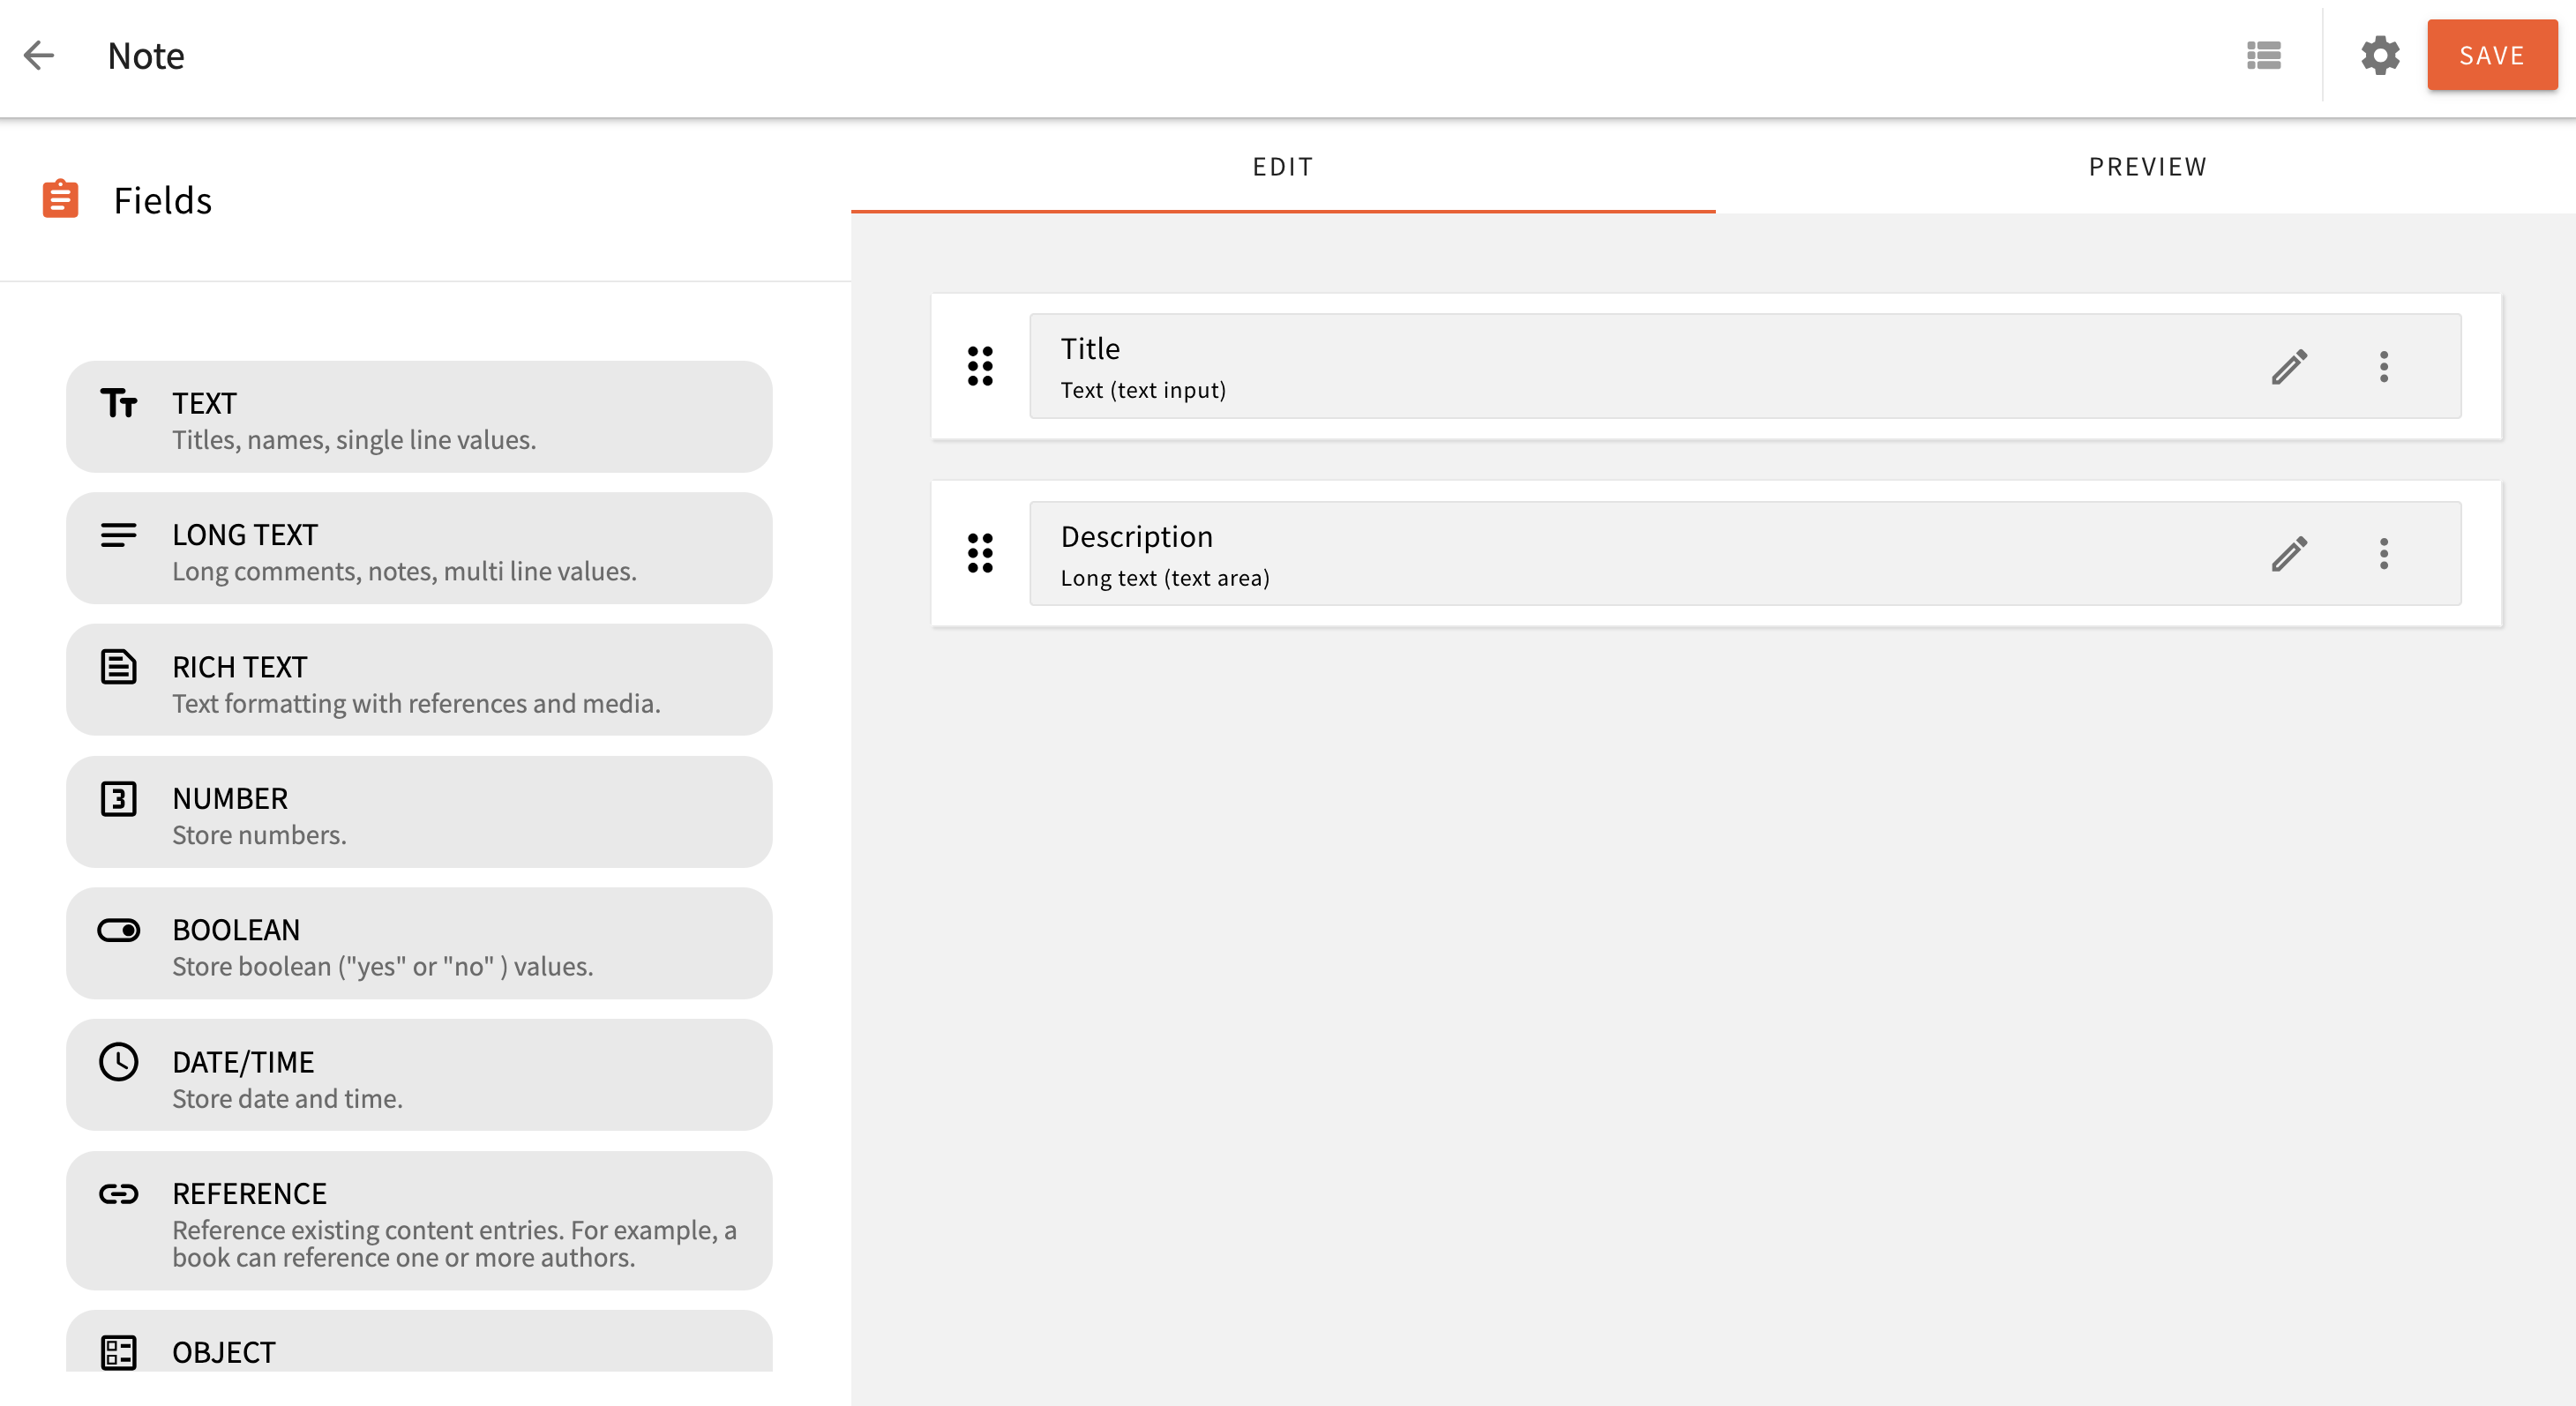 Add Title and Description Field to Note Model
 Great, we’re all set on the Webiny side. Now, let’s move on to building the Notes App in React.