Headless CMS > extensions
Content Entry Live Preview
Learn how to implement a Live Preview component for Webiny Headless CMS.
This feature is available since Webiny v5.40.0.
- how to listen for changes on the Content Entry form
- how to implement a Live Preview (visual feedback) for content creators
Overview
As a content creator, using a Headless CMS can be daunting, because you don’t get immediate feedback on what the content you’re creating will look like on your website. There’s a way to make this possible in the Headless CMS.
Goals
The solution presented in this article only covers the editing experience in the Admin app. It DOES NOT cover actual content rendering in your web application framework of choice. The goal of this article is to show a generic way of implementing a Live Preview in the Admin app, which reflects your frontend design and uses your frontend components to render content. Rendering and serving of actual website pages is left to you.
The goal is to create a separate “preview” app (this can be a dedicated route in your existing website app, or a completely dedicated app) which is receiving changes from the Admin app as soon as changes are made to the data in the content entry editor. Whatever the frontend implementation, we’ll refer to it as a Preview app from this point on in the article.
The mechanics covered in this article are framework agnostic. The editor part of the process will be implemented in React, but the Preview app can be implemented in any JS framework. The provided Preview app implementation can easily be adapted to work in any JS framework, and the core functionality is written in plain Typescript to make it reusable.
The communication between the Admin and the Preview app is performed using the window.postMessage() API. The preview app is embedded into the Admin app via an iframe.
We’ll limit the preview functionality to a single content model only, so that the preview iframe is only visible when creating content entries for the Article content model.
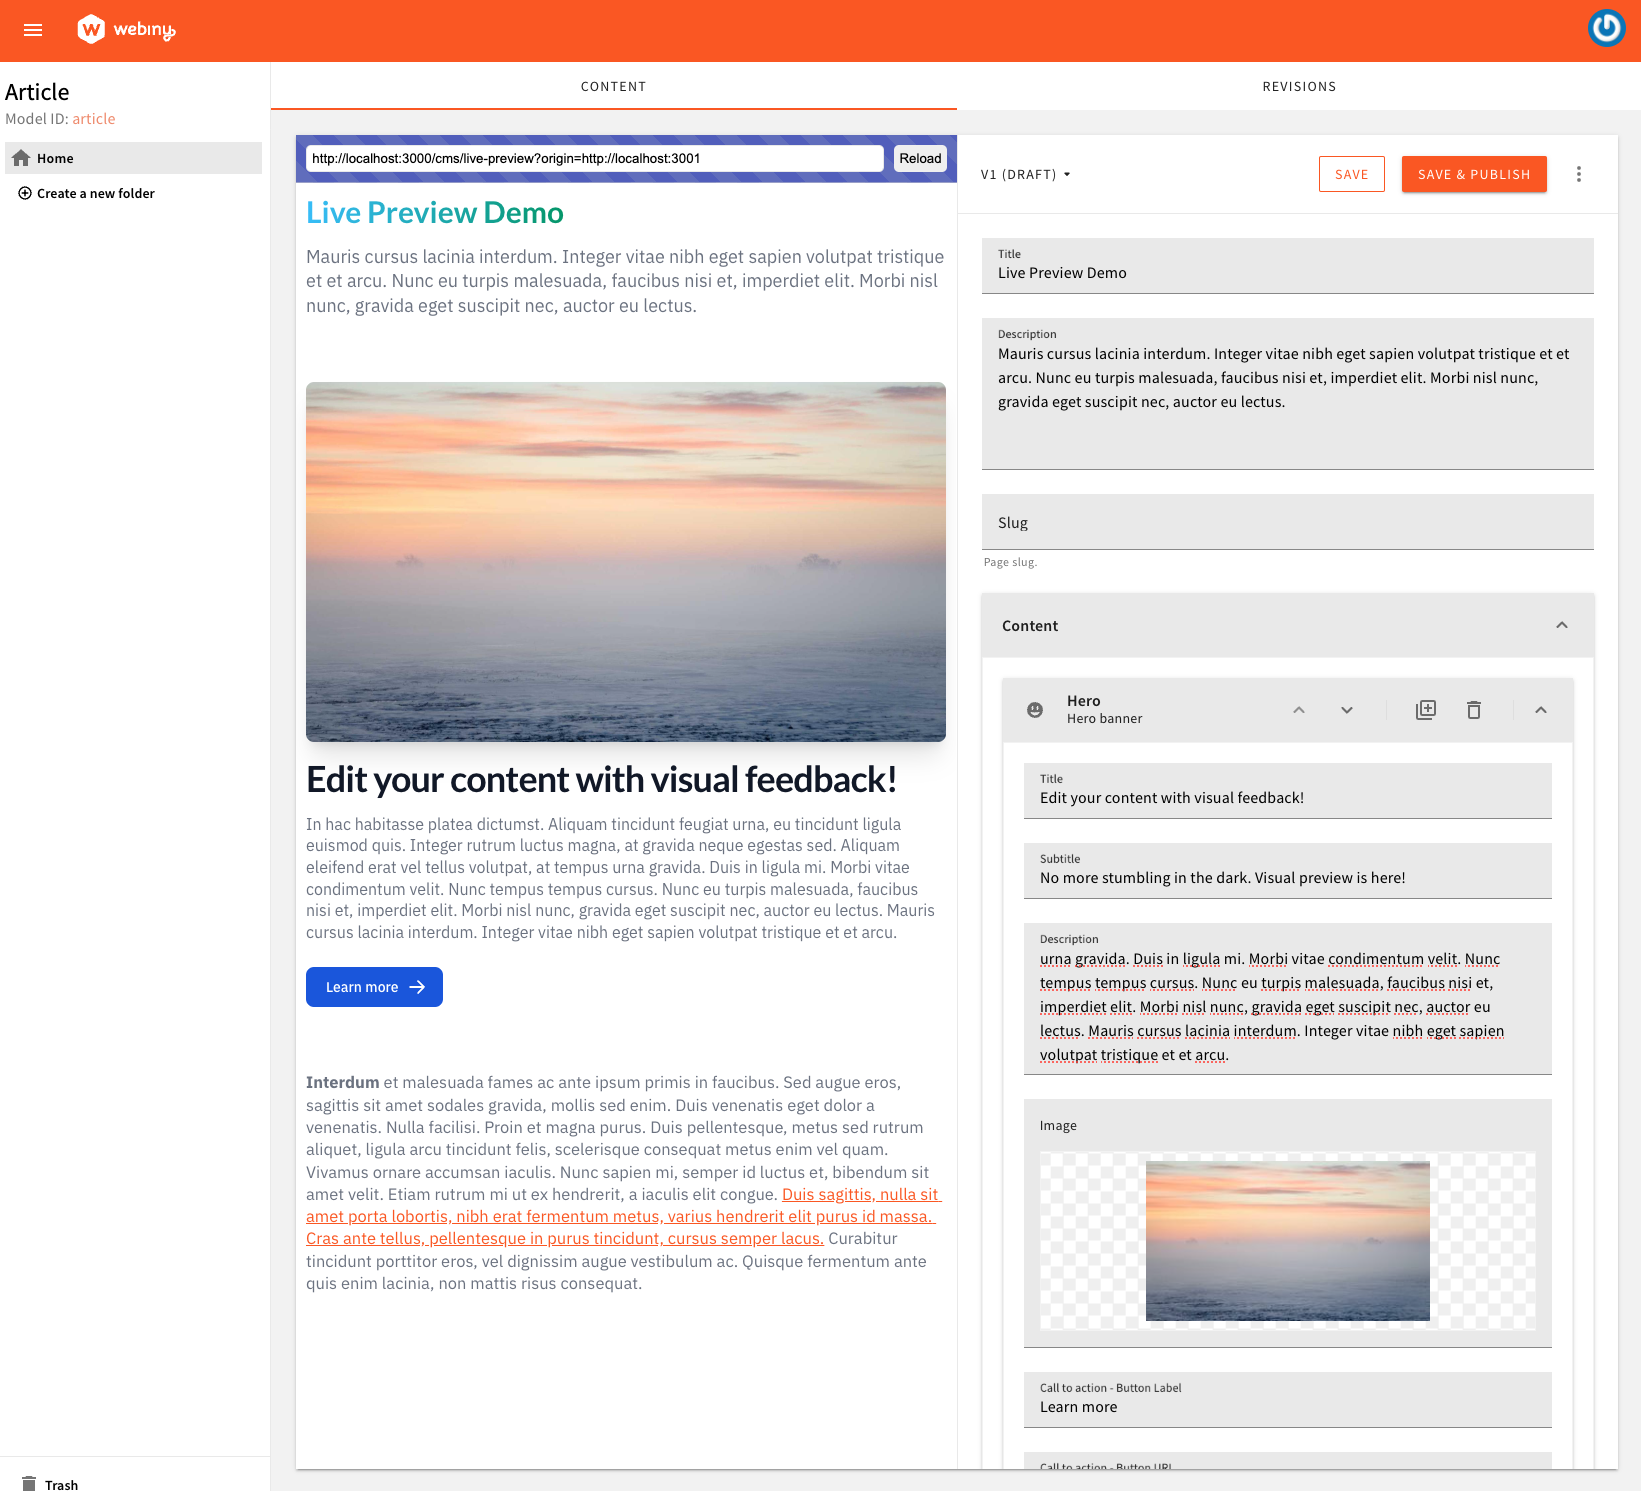 Article Entry Editor with Preview
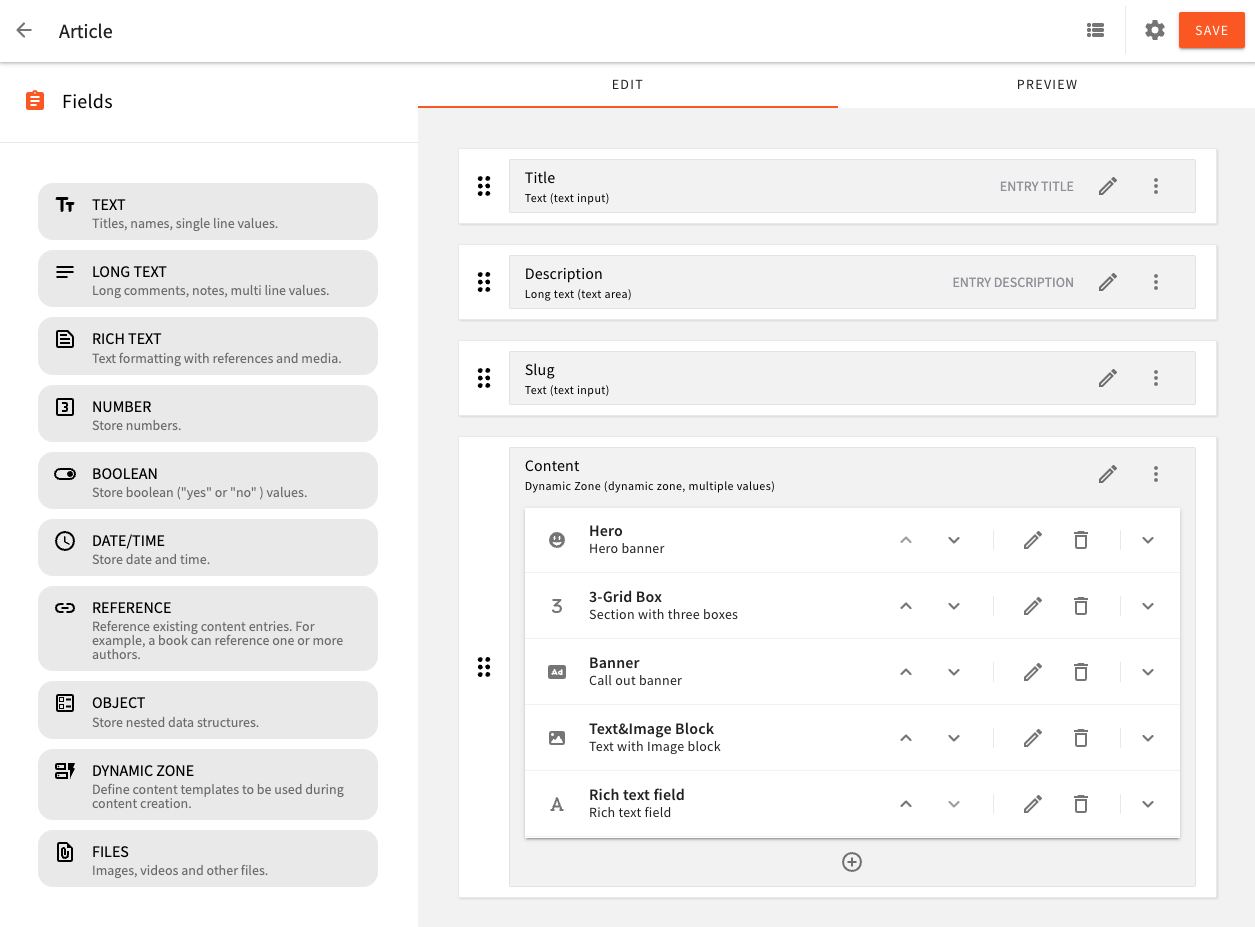 Article Content Model
The full source code for this article is located in the Webiny Examples repository. Instructions on setting up the demo source code in your own project are located in the README.md file next to the source code.
In this article, we’ll be referring to the full source
code hosted
in the Webiny Examples repository, and only describing the process and the outcomes.
Content Model
To begin, we need to create an Article content model which represents a website article, which we want to create a Live Preview for. We’ve provided an export of the model which you can simply import into your own project.
The content field of the Article content model is built using the Dynamic Zone field type, which allows you to define templates that represent your frontend components (blocks of data), which the content creator can then use to write the content within the constraints of the content model.
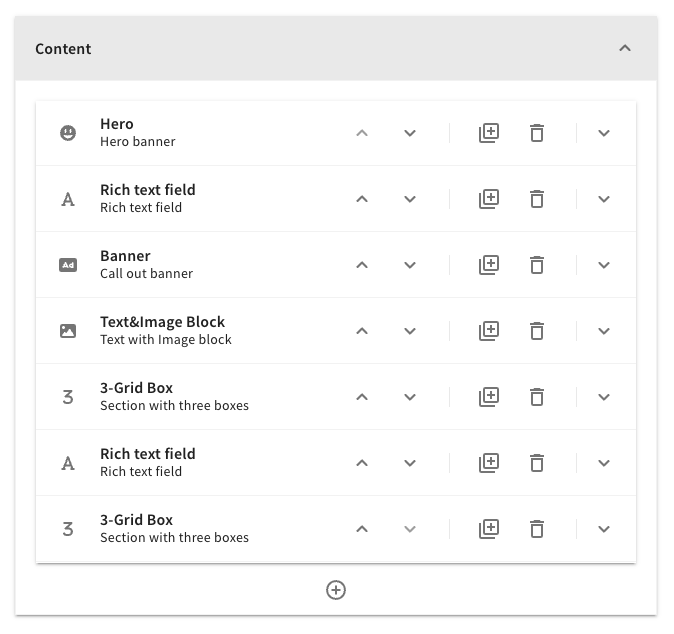 Article Content Using the Dynamic Zone Field
Add the Preview Pane
To add our Preview pane to the content entry form, we’re decorating the ContentEntryForm component and adding a new pane to the left of the original content entry form. We’re making sure this new pane is only rendered when we’re in the article content model context.
In the source code, you’ll find a getPreviewUrl function, which you will most likely want to tweak, to point to your own route or app. How you manage these URLs is entirely up to you. Let this code serve as a starting point, and feel free to tweak it to your needs.
The preview pane renders an iframe, and there’s also an address bar you can use to edit the preview URL, and also reload the Preview app.
Listen for Data Changes
To listen for changes on the content entry form, we decorate the useContentEntryForm hook. This gives us access to the current entry object, which we can then send to the Preview app for rendering.
In the source code, you’ll notice that there are 2 events that cause the entry to be sent to the Preview app:
when the Preview app is loaded in the iframe and reports to the parent (Admin) app
when a user edits the content entry
When using the window.postMessage() API, you’ll notice there’s a lot of messages being sent back and forth. Not all of them are created by your code. Many of those are generated by dev tools plugins, webpack hot reload, etc. Make sure you implement some kind of message filtering to reduce the noise, especially when console logging.
With this, your Admin app is ready to render the Live Preview, and push changes for rendering.
Preview App
In this example, we’re using our default website app to add the Live Preview functionality. The way we do it is by adding a custom route which we’re referencing from our preview pane in the Admin app.
Once this route is loaded, the LivePreview object is instantiated, and the Preview app reports to the Admin app. It is now ready to receive content entry updates and render the content!
The LivePreview class is generic, and has no dependencies. You can freely use it in any JS frontend framework.
In the Article component, you’ll find how the article data is rendered. The Article content field is a simple array of objects you can iterate on and render the appropriate components. Using Typescript type predicatesyou can also have proper code completion and type safety for all your Dynamic Zone templates, which you can then confidently map onto your content block components.