In this tutorial, we will use Eleventy (11ty) and Webiny to create a blog website, we'll learn how to connect to Webiny and use it as a source of data for our front end created with Eleventy. To learn how to use this data in the application, we will develop content models and data in the Webiny CMS. It would be nice if you have the following background knowledge before continuing.
- Have a basic understanding of JavaScript object destructuring procedures.
- Know how to access data from an API.
- Know the methods used to transfer data between components.
What Is Webiny?
Webiny is a serverless CMS that is open source and built with advanced tools and technologies. The Content Delivery API also allows you to interact with other technologies such as Gatsby, Next.js, and Astro. Webiny enables users to build websites and web apps in both large and small projects with minimal effort by providing all of the necessary tools, all of which are tuned to work together.
What Is Eleventy?
Eleventy, usually known as 11ty, is an easy yet effective static site generator. It converts data and templates into HTML pages using JavaScript. It builds quick sites by default, has quick construction times, and is user-friendly for beginners. It also offers a vibrant, welcoming community.
Setting Up an Eleventy Site
Eleventy does not offer a mechanism to build a new project, unlike rivals like Jekyll and Hugo, thus you must first create a standard Node.js project before adding Eleventy as a dependency.
The first step is to create a directory in your file system and open it using your terminal/cmd. The following command should take care of that:
mkdir eleventy-blog
cd eleventy-blog
At the root of your project, you need to initialize your project and install Eleventy as a dependency.
The following command should help you with that:
npm init -y
npm install -D @11ty/eleventy
Once the installation is complete, inspect the contents of the project’s directory with the command ls. It should contain a package.json file, a package-lock.jsonfile, and a node_modules directory.
Open the package.json file in your text editor, then replace the existing scripts property with the JSON below:
"scripts": {
    "build": "eleventy",
    "start": "eleventy --serve"
  },
Here we have two scripts:
build //-builds the website's files
start //-runs the web server locally on http://localhost:8080.
We will use the Nunjucks templating language for this project. Nunjucks is a common choice for many Eleventy projects. (Depending on your preference, you could also choose a different templating language.)
In the root directory of your project, create an index.njk file and add the following code inside.
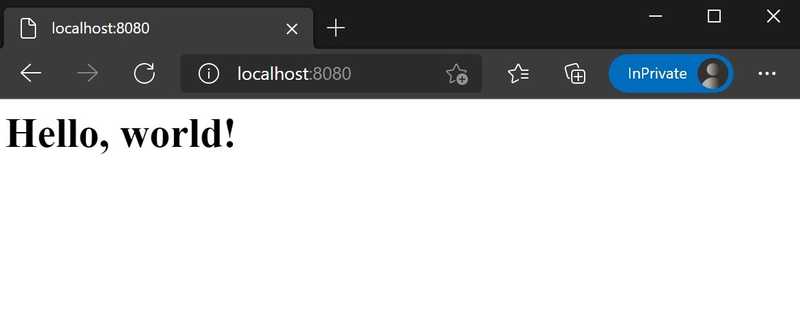
<h1>Hello, world!</h1>
To start the development server run the following command.
npm start
Open http://localhost:8080 in your web browser to access the web page after running the development server.
By hitting the keys Ctrl + C on your keyboard, you can exit the server at any time.
Creating the Homepage of Your Blog
You’ll need to create a base template that will be applied to all the pages of the site to make your project more flexible from the start. This is referred to as the base layout, and it needs to go into a layouts directory inside the _includes directory.
Use the following command to make the _includes/layouts directory:
mkdir -p _includes/layouts
Inside the _includes/layouts directory, create a base.njk file and paste the following code inside.
<!DOCTYPE html>
<html lang="en">
<head>
  <meta charset="UTF-8">
  <meta name="viewport" content="width=device-width, initial-scale=1.0">
  <title>{{ title }}</title>
</head>
<body>
  <header>
    <h1>{{ title }}</h1>
  </header>
  <main>
    {{ content | safe }}
  </main>
</body>
</html>
This will be the boilerplate that will serve as the foundation for all the pages on the website.
The contents in double curly braces are Nunjucks variables that will be replaced accordingly when a derivative page is being built.
The {{ title }} variable will be supplied through the page’s front matter block while the {{ content }} will be replaced with all incoming page content that is not part of the front matter. The latter is piped through the safe filter to prevent it from being escaped.
Let's go back to the index.njk file in your project root, and modify it as shown below:
---
title: Homepage
layout: layouts/base.njk
---

<h1>Welcome to this brand new Eleventy website!</h1>
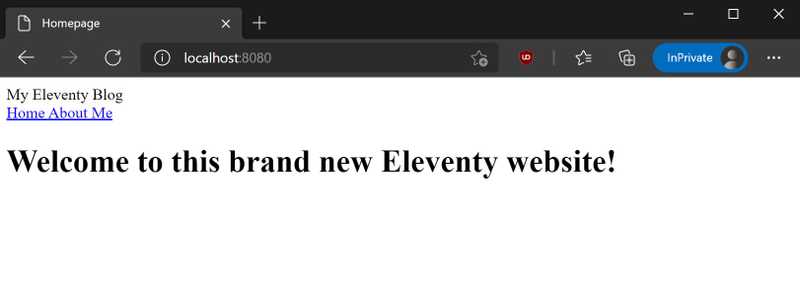
The front matter of the file is made up of the content on either side of the triple dashes, while the rest of the file's content will be sent to your layouts. The title and file layout are accordingly specified in the front matter.
Head over to the localhost URL of your website to see the changes
As you can see in the above picture, the base.njk template on the home page is now in effect.
Adding a Navigation Menu
You should put all of the website's components under the _includes directory. The contents of the _includes directory are partial files that can be placed in your layout to facilitate reuse.
In this section, we are going to create the navigation menu as a partial, and include the base layout.
In the _includes directory, create a new file named nav.njk and paste the code below.
It is the markup for the top navigation bar.
<nav class="navbar is-light" role="navigation" aria-label="main navigation">
  <div class="navbar-start">
    <div class="navbar-item has-text-weight-bold">
      My Eleventy Blog
    </div>
  </div>
  <div class="navbar-end">
    <a href="/" class="navbar-item">
      Home
    </a>

    <a href="/about" class="navbar-item">
      About Me
    </a>
  </div>
</nav>
After saving the nav.njk file, open up the base template file (_includes/layouts/base.njk)
in your editor. Include the new navigation partial in this file through the syntax shown below:
<!DOCTYPE html>
<html lang="en">
  <head>
    <meta charset="UTF-8" />
    <meta name="viewport" content="width=device-width, initial-scale=1.0" />
    <title>{{ title }}</title>
  </head>
  <body>
    **<header>{% include "nav.njk" %}</header>**
    <main>
      {{ content | safe }}
    </main>
  </body>
</html>
In your browser, the site should look like this:
The navigation menu ought to appear exactly as it does in the aforementioned screenshot when you check the home page once more. The site's title, "My Eleventy Blog" is hard-coded into the navigation component, but this is not ideal because it is likely that you will repeat the title elsewhere on the site. If you change the title later, finding all the places it was used will be difficult.
Providing this value using a global data file is a preferable strategy. These are JSON files placed in the _data directory at the project root that provides global data accessible to all template files.
At the project's root directory create _data directory , followed by a site.json file within it. Open and paste the following code inside the site.json file.
{
  "title": "My Eleventy Blog",
  "url": "https://example.com/",
  "language": "en-US",
  "description": "A simple blog with awesome content"
}
Return to the nav.njk and replace the hard-coded site title with the appropriate variable.
. . .
<div class="navbar-item has-text-weight-bold">
  {{ site.title }}
</div>
. . .
This tiny modification makes creating and updating global data much simpler while maintaining the same appearance and feel of the website.
It's important to keep in mind that global variables are scoped to the name of the JSON file, which is why we used {{site.title}} above.You can create other data files as needed, and use them in your templates.
Return to the index.njk file in the root of your projects directory and update its content as shown below so that it uses the site title and description:
---
title: Homepage
layout: layouts/base.njk
---

**<section class="hero is-medium is-primary is-bold">
  <div class="hero-body">
    <div class="container">
      <h1 class="title">{{ site.title }}</h1>
      <h2 class="subtitle">{{ site.description }}</h2>
    </div>
  </div>
</section>**
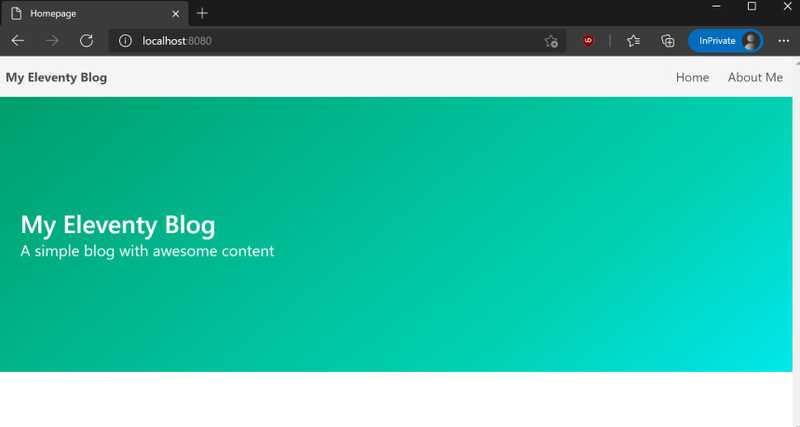
In the browser, the site should look like this:
Styling
Create a CSS folder at the root, followed by a style.css file within it. Inside the style.css, import the Bulma CSS framework by using the code below.
@import "https://cdn.jsdelivr.net/npm/bulma@0.9.2/css/bulma.min.css";
Next, create an .eleventy.js file in your project root. This is where Eleventy does its configurations similar to _config.yml file in Jekyll projects.
Paste the following code inside .eleventy.js.
module.exports = function (eleventyConfig) {
  // Copy the `CSS` directory to the output
  eleventyConfig.addPassthroughCopy('css');

  // Watch the `CSS` directory for changes
  eleventyConfig.addWatchTarget('css');
};
Your need to restart your server before the changes take effect. You`ll need to do this every time you modify this file.
You won't notice any changes in the browser right now because the style sheet hasn't been linked to any template. Go ahead and add it to the base.njk template as shown below.
<!DOCTYPE html>
<html lang="en">
  <head>
    <meta charset="UTF-8" />
    <meta name="viewport" content="width=device-width, initial-scale=1.0" />
    <link rel="stylesheet" href="/css/style.css" />
    <title>{{ title }}</title>
  </head>
  <body>
    <header>{% include "nav.njk" %}</header>
    <main>
      {{ content | safe }}
    </main>
  </body>
</html>
Output
Creating the Homepage of Your Blog
Currently, there is a non-existing “About” Page in the navigation menu. We will change that
By creating a unique layout for static pages, and afterward the about page. Inside the _includes/layouts folder, create a page.njk file. This will be the layout for all static pages on our site.
Open up the file you've just created and paste the following code inside. The front matter layout property is used to indicate that the page layout should inherit from the previously created base.njk template(known as layout chaining). It allows us to reuse a template while adding unique elements that are specific to the new template, which helps avoid unnecessary repetition.
---
layout: layouts/base.njk
---

<article class="page-layout">
  <div class="container">
    <div class="columns">
      <div class="column is-8 is-offset-2">
        <div class="content mt-5">
          <h1>{{ title }}</h1>
          {{ content | safe }}
        </div>
      </div>
    </div>
  </div>
</article>
Now that we have the page layout, we can create the “About” page. To do this, create a new directory in the project root named about,followed by an index.md file within it. Add the following code to the file:
---
title: About Me
layout: layouts/page.njk
---

I am a person that writes stuff.
Go to https://localhost:8080/about. The page should load correctly with the specified layout.
Creating other pages can be done the same way.
Creating Posts
A page can be created similarly to a blog entry. At the project root, you should first create a directory called posts to house all articles.
The layout for posts will be different, though. The format will be identical to that of pages, but you'll add a date to make it stand out. It's a good idea to design a separate layout for each post and page as you'll probably need distinct layouts for each in a real-world project.
Inside the _includes/layouts directory, create a new post.njk file and paste the following inside:
---
layout: layouts/base.njk
---

<section class="page-layout">
  <div class="container">
    <div class="columns">
      <div class="column is-8 is-offset-2">
        <article class="content mt-5">
          <h1 class="title">{{ title }}</h1>
          <p class="subtitle is-6">
            Published on: <time datetime="{{ page.date }}">{{ page.date }}</time>
          </p>
          {{ content | safe }}
        </article>
      </div>
    </div>
  </div>
</section>
Very much like the page.njk template, the post template extends the base template with additions that make sense for posts (such as the date of publication).
To use this template, create a new file in your posts directory called first-post.md, and paste the following inside:
---
title: My First Blog Post
description: This is the first post on my blog
tags: post
date: 2021-06-19
layout: layouts/post.njk
---
You’ll find this post in your posts directory. Go ahead and edit it and rebuild the site to see your changes. You can rebuild the site in many different ways, but the most common way is to run eleventy --serve, which launches a web server and auto-regenerates your site when a file is updated.
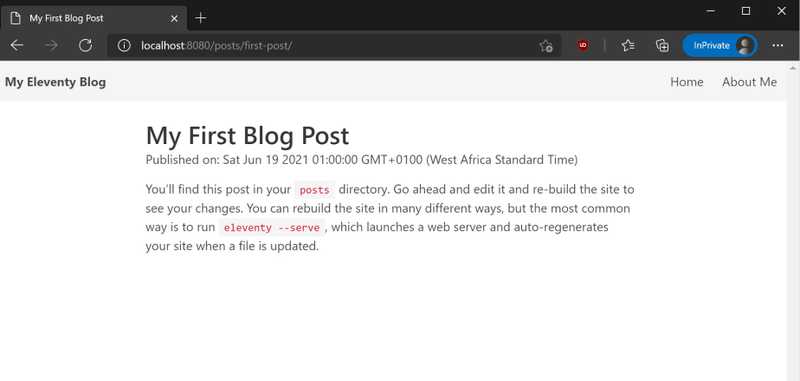
Head over to http://localhost:8080/posts/first-post in your browser. Notice how the URL corresponds to the location of the file in the project (excluding the extension). This is how URLs are handled by default, but they can be changed to some other format through the permalink key.
Although the post is successfully shown, take note of how the date is now formatted. Eleventy, unlike the majority of other SSGs, does not include built-in formatting options for dates, which makes it difficult for users to read. This implies that to get a more legible format in Eleventy, you must utilize an external package.
Filters in Eleventy
Eleventy supports filters that can be used to change the content in a variety of ways. For instance, the safe filter that was used before prevents HTML content from being escaped, and there are additional built-in ones like a slug for converting text into strings that may be used in URLs. Additionally, you can include your unique custom filters and utilize them with any template. The configuration file allows for these adjustments.
To format the date, we will add a lightweight JavaScript library for date formatting known as Luxon. The following command should take care of that for us. Open the .eleventy.js and update its contents with the following
**const { DateTime } = require('luxon');**

module.exports = function (eleventyConfig) {
  // Copy the `css` directory to the output
  eleventyConfig.addPassthroughCopy('css');

  // Watch the `css` directory for changes
  eleventyConfig.addWatchTarget('css');

  **eleventyConfig.addFilter('readableDate', (dateObj) => {
    return DateTime.fromJSDate(dateObj, { zone: 'utc' }).toFormat(
      'dd LLL yyyy'
    );
  });**
};
How to apply a unique filter to Eleventy is explained in the highlighted lines.
Save the config file and restart the server so that the changes take effect.
Then use the readableDate filter in the _includes/layouts/post.njk template as shown below to format the post date according to the specified layout.
. . .
<p class="subtitle is-6">
  Published on: <time datetime="{{ page.date }}">{{ page.date | readableDate }}</time>
</p>
. . .
Displaying Posts on the Homepage
It is always a good idea to list your posts on the homepage. We will use Eleventy’s collections feature to implement this functionality.
Update your index.njk file with the highlighted code below:
---
title: Homepage
layout: layouts/base.njk
---

<section class="hero is-medium is-primary is-bold">
  <div class="hero-body">
    <div class="container">
      <h1 class="title">{{ site.title }}</h1>
      <h2 class="subtitle">{{ site.description }}</h2>
    </div>
  </div>
</section>

<section class="postlist mt-3 pt-3">
  <div class="container">
    <h2 class="title has-text-centered mt-3 mb-6">Recent posts</h2>
    <div class="columns">
      {% for post in collections.post | reverse %}
        {% if loop.index0 < 3 %}
          <div class="column">
            <div class="card">
              <header class="card-header">
                <p class="card-header-title">
                  {{ post.data.title }}
                </p>
              </header>
              <div class="card-content">
                <div class="content">
                  {{ post.data.description }}
                </div>
              </div>
              <footer class="card-footer">
                <a href="{{ post.url }}" class="button is-fullwidth is-link card-footer-item">Read article</a>
              </footer>
            </div>
          </div>
          {% endif %}
      {% endfor %}
    </div>
  </div>
</section>
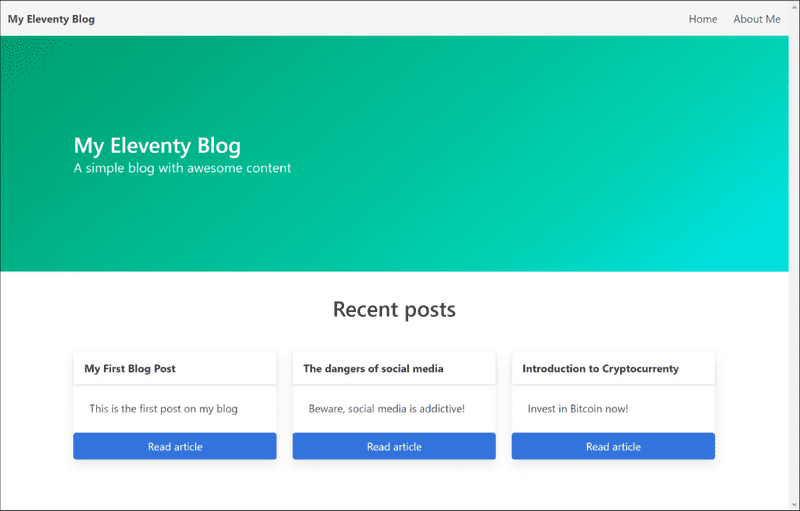
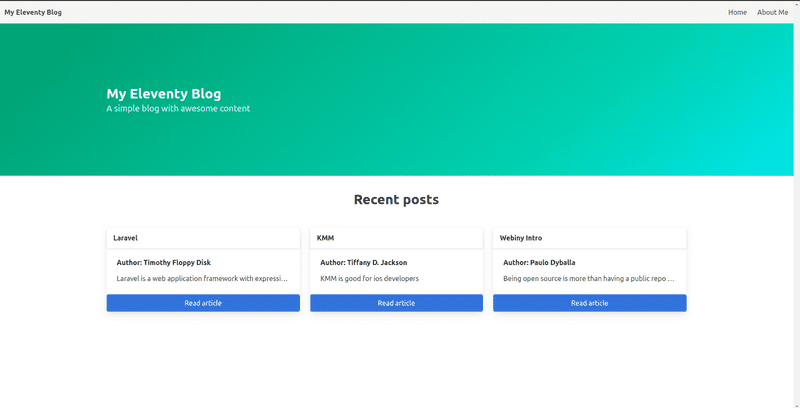
After saving the file, go to the homepage in the browser to see the results. It should look similar to the screenshot below.
Setting Up and Deploying a Webiny Project
Prerequisites
Before we proceed make sure you have the following:
Node version 14 or greater. If you don't have
Node.jsinstalled you can download it using the link below. Node js.Yarn version
^1.22.0 || >=2AWS account and user credentials-In order to deploy Webiny, you must have a valid AWS account and user credentials set up on your system.
Click the link above to set up your AWS Account.
Set Up Webiny
Once you have put all the necessary things in place, run the following command :
npx create-webiny-project my-new-project
Webiny currently supports two storage types: DynamoDB and DynamoDB+Elasticsearch. Choose the option that best meets your needs.
Deploy Webiny
Once the Webiny project is created, we are going to deploy it into your AWS account. The following command should take care of that.
cd my-new-project
yarn webiny deploy
The first deployment might take a little bit long but once the deployment is done, You will be given the URL through which you can access your Admin Area where you will be required to create an admin user.
Authenticating With Webiny's API
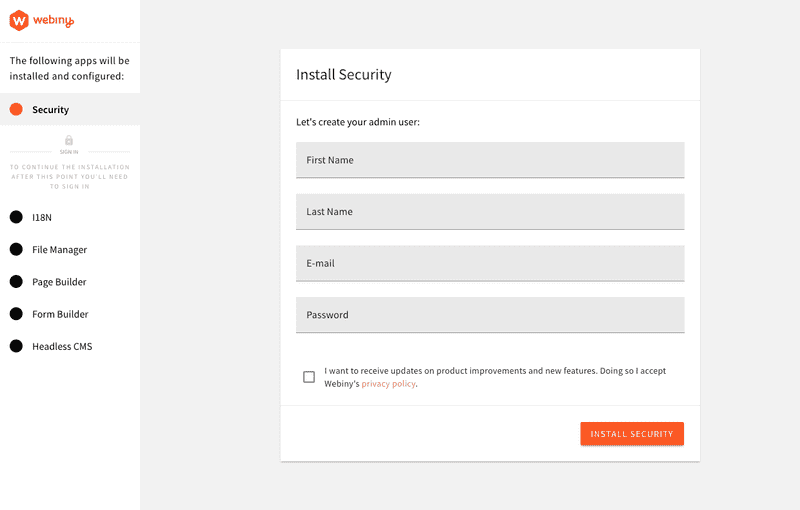
When the deployment is complete, you can click on the admin Admin app, which will take you to the admin area, where you must create an admin user. The admin page is depicted in the image below.
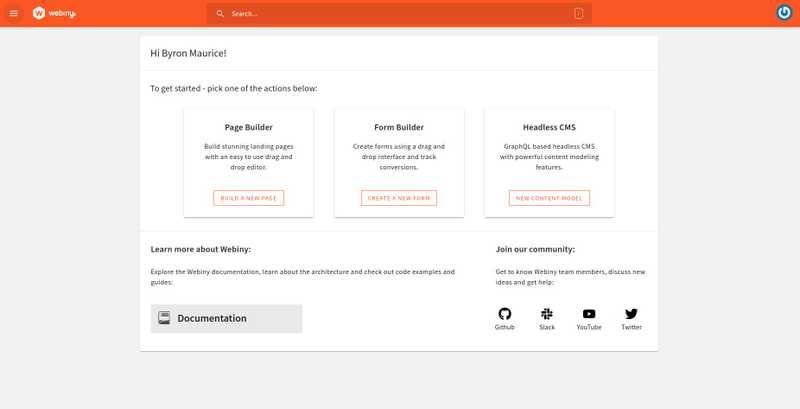
After creating the admin user and all the installations are done, you’ll be redirected to the dashboard.
In the Headless CMS card, click the NEW CONTENT MODEL button to go to the area where we will create our content models.
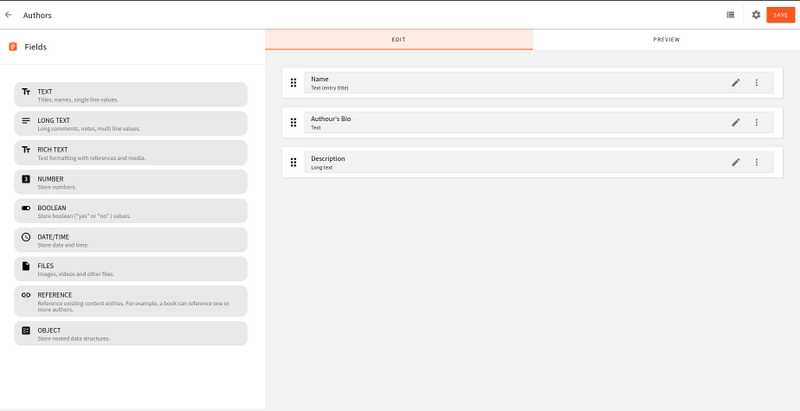
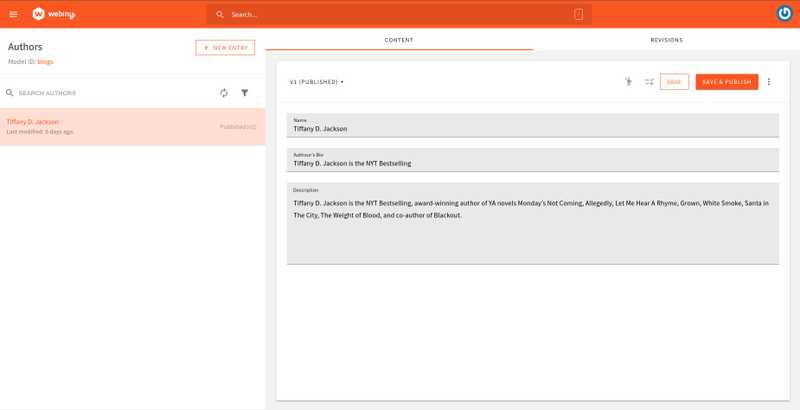
Next, We are going to create a new Module named “Authors”
The Authors content model is depicted in the image below. You can make it exactly like this or customize it to your specifications.
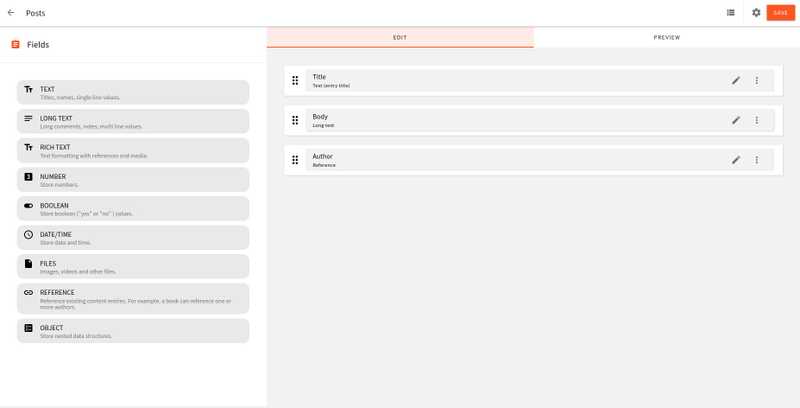
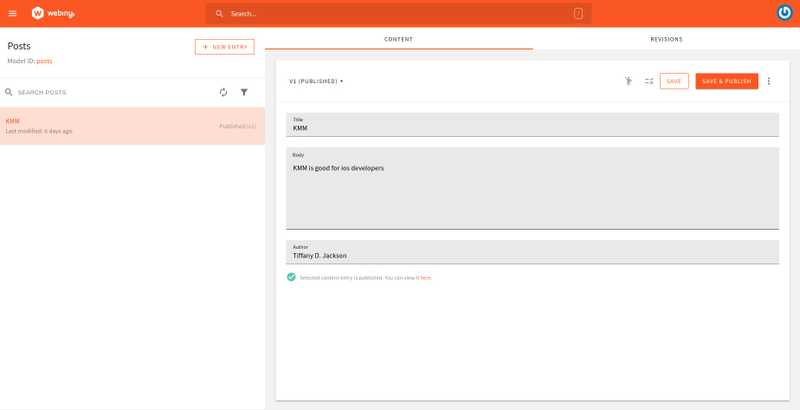
Create another model named Posts and its contents should look like the image below.
After you've completed the preceding processes, we'll need to connect our Eleventy application to the Headless CMS so that we can always perform GraphQL API requests. To begin this step, navigate to the ACCESS MANAGEMENT tab on the dashboard.
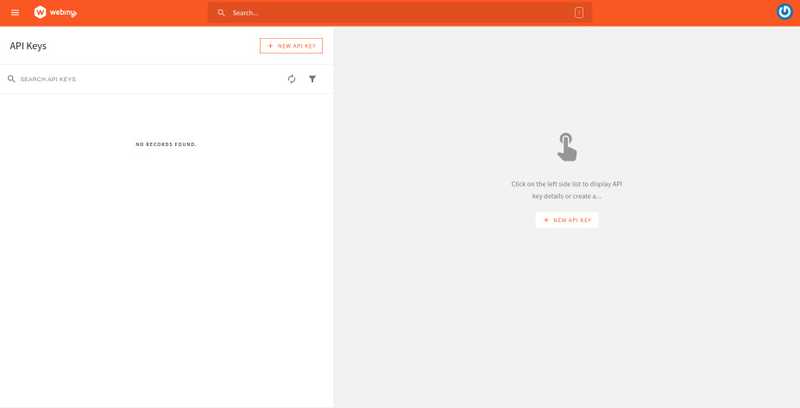
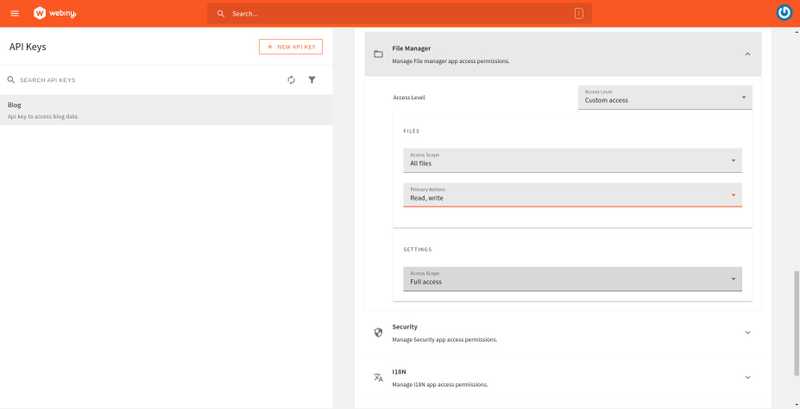
Click on API Keys, it should redirect you to a page similar to the one below.
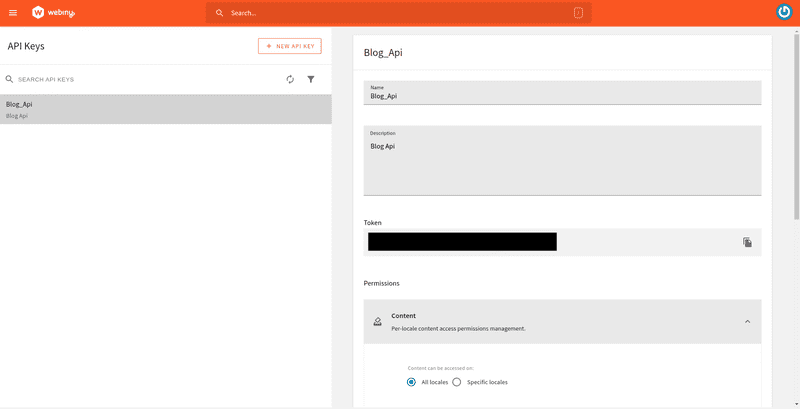
Go ahead and create a new API Key. The output should is shown in the image below
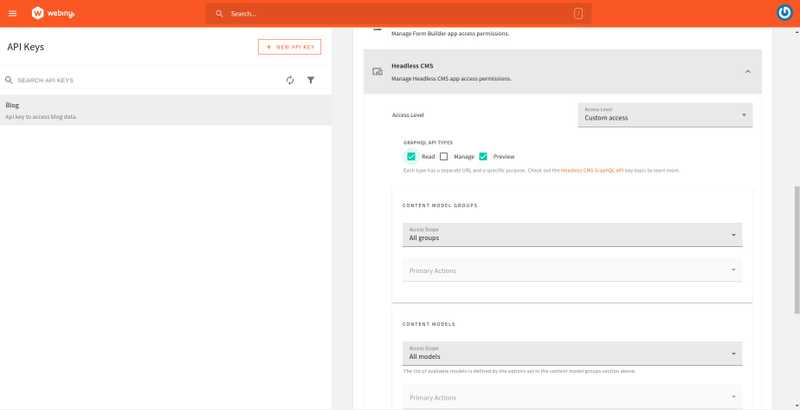
Select All groups from the CONTENT MODEL GROUPS drop-down. Then, in the Access Scope drop-down, select All models. Select All entries in the CONTENT ENTRIES drop-down.
The image below shows all the appropriate settings for the File Manager.
When you're finished, click the SAVE API KEY button and copy the API key to a safe location. This will be used later to authenticate with the GraphQL API.
Adding Content
Let's start adding content to our models. Go to Headless CMS > Ungrouped > Authors and click on New entry after clicking on the menu icon. Fill in the blanks, then hit the save & publish button. You can repeat this as many times as you like.
Fill in the entries for the Post model in the same way. Then press the save and publish button.
API Playground
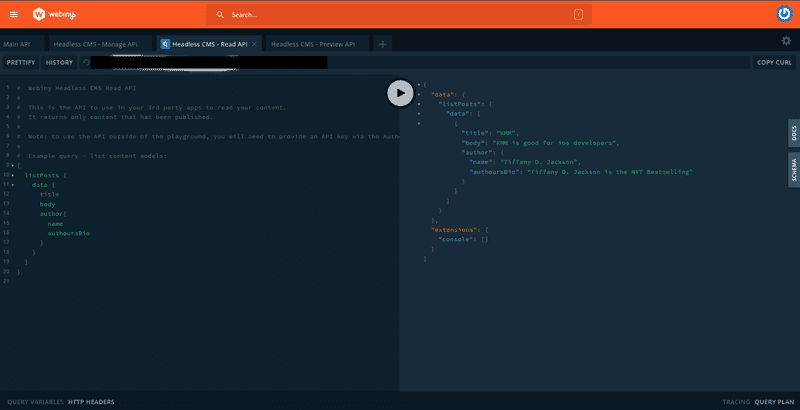
To view the data that we will be fetching on the front end of our application, we can use the built-in API from Webiny Headless CMS. Click the menu icon, then select API Playground.
The tabs at the top of the page contain four APIs. Headless CMS - Read API should be selected. After that, you can look into your content structure and schema (via the right-side panel). Directly beneath the tabs is a URL string. Data will be retrieved using this URL. Keep the URL somewhere safe in case we need it later.
Fetching Data For Pages Using Webiny Headless CMS
At this point, we have a definite understanding of how these two tools work, but how do we integrate them? This question seems daunting until you find out that webiny’s GraphQL APIs
are non-agnostic, they are just like any graphql API, all that is needed is a client that can query the graphql endpoint that Webiny defines.
To obtain the endpoint, enter this command in your console.
yarn webiny info --env dev
Setting Up the Token in Our Eleventy Project
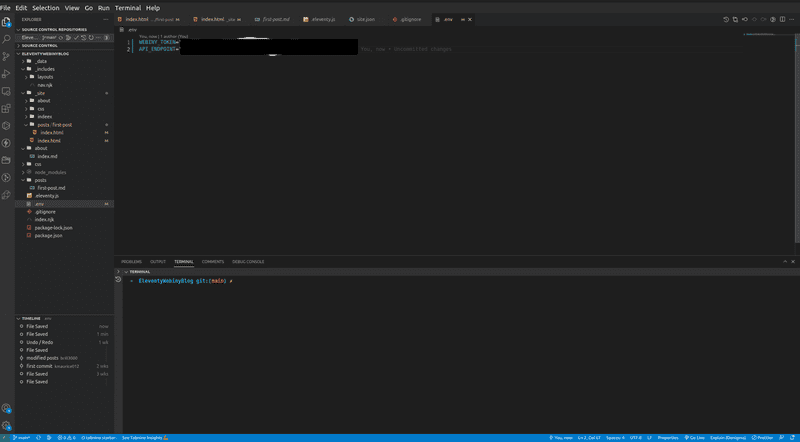
We now need to retrieve the security token that we had generated previously. We need this token to authenticate our queries to this endpoint. We shall save this token in a .env file to ensure that it cannot be easily accessed by malicious users.
Create a file .env and add a variable WEBINY_TOKEN with the token as its value
Querying the API Using Axios
There are many API clients out there we can use to query a graphql end-point, some are specialized for graphql such as Apollo or graphql-request, while these are the optimal solutions we shall avoid using them in this guide to reduce complexity and a common HTTP API client Axios. One can use the FETCH API which comes as a default and requires no dependencies but it has fewer features than what Axios has to offer.
Let’s install Axios in our Eleventy Project;
npm install axios
In Eleventy it is most common to place backend querying files under the _data directory and we shall do the same. Create a file called data.js and add the contents below, we shall get to the step-by-step breakdown in a moment.
let axios = require('axios');
let data = JSON.stringify({
 query: `{
 listPosts {
   data {
     title
     body
     author{
         name
         authoursBio
     }
   }
 }
}`,
 variables: {}
});

let config = {
 method: 'post',
 url: `${process.env.API_ENDPOINT}`,
 headers: {
   'Authorization': `Bearer ${process.env.WEBINY_TOKEN}`,
   'Accept': 'application/json',
   'Content-Type': 'application/json'
 },
 data : data
};


const getPosts = async () => {
   try {
     const {data}  = await axios(config)
     return data && data.data && data.data.listPosts && data.data.listPosts.data ? data.data.listPosts.data : []
   } catch (e) {
     throw new Error('There was a problem getting Post', e);
   }
 };
  exports.getPosts = getPosts;
The first step is to import the Axios library,
var axios = require('axios');
We then need to define the query we are sending to the end-point as shown below, in this case,we are trying to fetch all the blog posts and query the title, body, and author.
const data = JSON.stringify({
 query: `{
 listPosts {
   data {
     title
     body
     author{
         name
         authoursBio
     }
   }
 }
}`
 variables: {}
});
We can define Axios configurations to tell Axios what format we want the data to be in, and also add the token to the request. The method should be of type post, and the data type should be JSON, we should also have an authentication header with the bearer token set to it as shown below
let config = {
 method: 'post',
 url: `${process.env.API_ENDPOINT}`,
 headers: {
   'Authorization': `Bearer ${process.env.WEBINY_TOKEN}`,
   'Accept': 'application/json',
   'Content-Type': 'application/json'
 },
 data : data
};
If you are not familiar with .env files, it's quite simple. You just use process.env{VARIABLE_NAME} to access the variables that you set within your .env file, then you can use whatever restrictions to access the file that you see fit.
The query we defined is set as the data (body, in case you are using fetch), to be sent to the endpoint.
Create a function getPosts, we should define it as an asynchronous function which will return an array containing a post object with an author object nested inside of it.
const getPosts = async () => {
   try {
     const {data}  = await axios(config)
     return data && data.data && data.data.listPosts && data.data.listPosts.data ? data.data.listPosts.data : []
   } catch (e) {
     throw new Error('There was a problem getting Post', e);
   }
 };
It's prudent that you make sure the function returns the required data type in this case an array, this is good programming practice, you should avoid working with a function whose return type is uncertain.
Export the function to use it in the next step.
We can then create a post.js that calls the getPost function and return an array of posts as its return type
const { getPosts } = require('./graphql/data');

module.exports = async () => {
 const posts = await getPosts()
 return {
   posts,
 };
};
Since we have exported this module, it means we can use the posts across the application that includes displaying them on our pages.
We will edit our index.njk file displaying a card for each blog post we have in our database, displaying the author of the blog post too.
<div class="columns">
     {%- for post in post.posts -%}
       <div class="column">
         <div class="card">
           <header class="card-header">
             <p class="card-header-title">
               {{ post.title }}
             </p>
           </header>
           <div class="card-content">
             <div class="content">
               <h6>Author: {{ post.author.name }}</h6>
               <div style=" white-space: nowrap; width: 200px; overflow: hidden;   text-overflow: ellipsis; ">{{ post.body }}</div>
             </div>
           </div>
           <footer class="card-footer">
             <a href="#" class="button is-fullwidth is-link card-footer-item">Read article</a>
           </footer>
         </div>
       </div>
     {% endfor %}
   </div>
To get the posts we call the file in which the getPosts function is called which gives us an object containing a key posts hence post.posts gives us an array of blog posts
{%- for post in post.posts -%}
We loop through the posts using a for loop and display the title author name and body of the blog post and also a button that should redirect you to that particular blog post.
Conclusion
When you start building your blog, having a CMS that helps you manage how content is structured is a huge help, and Webiny Headless CMS is a great place to start.
I hope this article has given you a basic understanding of how JavaScript can be used to create practical and real-world solutions to problems. Thank you for your time!
Full source code: https://github.com/webiny/write-with-webiny/tree/main/tutorials/EleventyWebinyBlog
